


Paper engraving stands as a meticulous art form that involves etching or incising designs onto paper surfaces with precision and detail. It's a craft that has historically held significance in various cultural, artistic, and industrial realms. The intricacy of engraved paper often showcases a level of artistry and craftsmanship that elevates ordinary paper into stunning works of visual delight. Whether you're a beginner or an experienced artisan, this blog aims to teach you how to engrave paper with step-by-step guides.

In this article:
Part 1: Applications and Uses of Paper Engraving
The versatility of paper engraving finds applications across multiple industries. In the realm of fine arts, engraved paper serves as a medium for expressing intricate designs and detailed artwork. Additionally, it's used in commercial printing for creating elegant invitations, business cards, and specialized stationery.
Moreover, the technological advancements in paper engraving techniques have facilitated its integration into modern industries like packaging, where custom-designed, engraved packaging materials are becoming increasingly popular for brand differentiation and aesthetic appeal.
Part 2: Preparation of Paper Engraving
Tools and Materials Required
- Engraving Pens: Varied tip sizes and types for creating fine lines and intricate details.
- Cutting Mats: Essential for protecting work surfaces and ensuring controlled cuts during the engraving process.
- Specialized Paper: Choose suitable paper types such as heavyweight or textured papers designed for engraving.
- Precision Cutting Tools: Scalpels, X-Acto knives, or other precise cutting instruments for relief engraving and detailing work.
- Transfer Paper or Tracing Tools:Aid in transferring designs accurately onto the chosen paper for engraving.
Preparation Steps
- Choosing Design Patterns: Selecting and planning the design layout is a fundamental step before commencing the engraving process.
- Tracing and Transferring Designs onto Paper: Techniques such as tracing or using transfer paper aid in transferring designs accurately onto the chosen paper.
- Securing the Paper for Engraving: Properly securing the paper onto a stable surface ensures stability and precision during the engraving process.
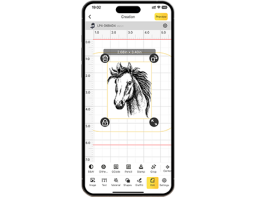
Part 3: Line Engraving on Paper
Line engraving on paper demands precision and meticulousness. Here's a breakdown of the tools required, steps involved, and some valuable tips for achieving exemplary results:
1. Tools for Line Engraving:
- Engraving Pens: Varied tip sizes and types for creating diverse line weights and intricate details on paper.
- Cutting Mats: Essential for protecting work surfaces and ensuring stability while engraving.
- High-Quality Paper: Opt for paper specifically designed for engraving work, providing a smooth yet durable surface.
- Tracing Tools: Such as carbon paper or graphite transfer paper, aiding in accurately transferring designs onto the engraving paper.
2. Steps for Line Engraving:
Step 1: Preparation
Secure the paper onto a stable surface using tape or clips.
Choose the appropriate engraving pen based on the desired line thickness and intricacy of the design.
Step 2: Incision
Begin engraving by applying controlled pressure on the pen.
Start with light strokes to outline the design before gradually adding depth with increased pressure.
Maintain consistency in strokes to ensure uniformity in the engraved lines.
Step 3: Detailing
Pay attention to intricate details within the design, adjusting pressure and pen angle for varied line effects.
Work systematically, tackling one section at a time to maintain focus and precision.
Step 4: Refinement
Once the engraving is complete, inspect for any missed or shallow lines.
Use lighter strokes to refine details or deepen lines where necessary.
3. Tips for Line Engraving:
- Practice Control and Consistency: Mastering control over the engraving pen's pressure and movement is key to achieving consistent and clean lines.
- Experiment with Pressure: Varying pressure on the pen creates diverse line weights, allowing for depth and dimension in the design.
- Start Light, Build Gradually:Begin with light strokes to establish the design before adding depth gradually with increased pressure.
- Work in Sections: Engrave one section at a time, ensuring attention to detail and preventing errors or smudging.
- Patience and Practice: Line engraving demands patience and consistent practice to refine skills and achieve mastery.
Part 4: Relief Engraving on Paper
Relief engraving on paper involves creating raised designs and textures. Here's a breakdown of the necessary tools, steps, and useful tips for achieving successful relief engravings:
1. Tools for Relief Engraving:
- Cutting Tools: Precision cutting instruments like scalpels or X-Acto knives for carving out the background of the design.
- Engraving Pens or Styli: For refining and detailing the raised areas of the relief design.
- Heavyweight Paper: Specifically chosen for its ability to withstand the relief engraving process without tearing or buckling.
- Transfer Paper or Tracing Tools: For accurately transferring designs onto the paper for relief engraving.
2. Steps for Relief Engraving:
Step 1: Design Selection and Transfer
Choose a suitable design for relief engraving.
Transfer the design onto the paper using transfer paper or tracing tools.
Step 2: Background Removal
Secure the paper onto a stable surface.
Use the cutting tools to carefully carve and remove the areas around the intended raised design.
Work gradually and precisely, ensuring the raised design remains intact.
Step 3: Refinement and Detailing
Once the background is removed, refine the raised design, ensuring smooth edges and desired texture.
Use engraving pens or styli to add finer details and enhance the raised areas for depth and visual interest.
3. Tips for Relief Engraving:
- Controlled and Precise Cutting: Exercise caution while cutting to ensure accuracy and avoid unintended damage to the design.
- Gradual Background Removal: Work slowly when removing the background to prevent accidental damage to the raised design.
- Experiment with Textures: Vary the carving techniques to create different textures within the raised design for added visual appeal.
- Refine Details Carefully: Take time to refine the raised design and add intricate details to elevate the overall appearance.
- Practice Patience: Relief engraving requires patience and attention to detail; take breaks to maintain focus and accuracy.
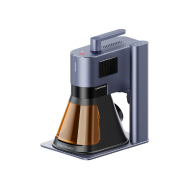
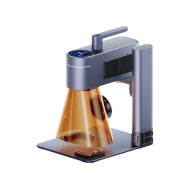
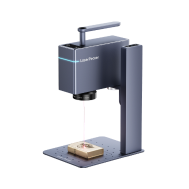
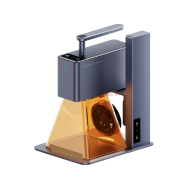
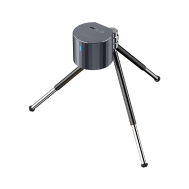
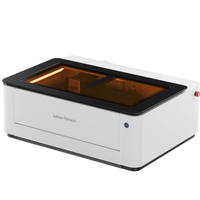
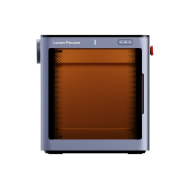
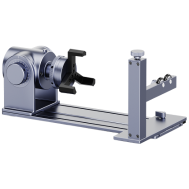
Part 5: Laser Engraving on Paper
Laser engraving on paper offers precision and intricate detailing. Below are the essential tools, steps involved, and valuable tips for achieving successful laser engravings on paper:
1. Tools for Laser Engraving:
- Laser Engraving Machine: Select a laser engraver compatible with paper materials, ensuring the appropriate power and settings for paper engraving.
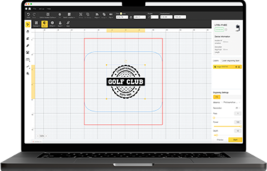
- Computer Software: Use design software to create or modify designs for laser engraving onto paper.
- Quality Paper: Opt for paper suitable for laser engraving, considering thickness and surface quality.
- Protective Gear: Safety glasses and appropriate ventilation to ensure safety during laser engraving.
2. Steps for Laser Engraving:
Step 1: Design Preparation
Create or import the desired design into the software program.
Adjust design settings, such as size and orientation, as per the paper dimensions and engraving requirements.
Step 2: Paper Setup
Secure the paper onto the laser engraving machine's bed or platform.
Ensure the paper is flat and well-positioned to avoid misalignment during engraving.
Step 3: Engraving Parameters
Set the laser engraving machine parameters, including power, speed, and resolution settings suitable for paper engraving.
Conduct test runs on scrap paper to fine-tune settings and ensure desired results before engraving on the actual piece.
Step 4: Engraving Process
Initiate the engraving process through the software interface, allowing the laser to follow the designated pattern onto the paper surface.
Monitor the engraving progress and ensure consistent quality throughout the process.
3. Tips for Laser Engraving:
- Test on Scrap Paper: Conduct test engravings on similar paper types to ensure optimal settings and design outcomes before engraving the final piece.
- Maintain Cleanliness: Keep the paper surface free from debris or dust particles that could interfere with the engraving process.
- Avoid Over-Scorching: Adjust power and speed settings to prevent excessive burning or scorching of the paper surface.
- Proper Ventilation: Ensure proper ventilation in the workspace to dissipate any fumes or odors produced during the engraving process.
- Regular Maintenance: Maintain the laser engraving machine regularly for optimal performance and consistent engraving quality.
Part 6: Hot 10 FAQs About Engraving Paper
- Can any type of paper be used for engraving?
Engraving works best on heavier weight papers that can withstand the pressure and cutting involved. Specialty papers designed explicitly for engraving yield the best results.
- What are the differences between line engraving and relief engraving on paper?
Line engraving involves creating intricate designs through precise incisions, while relief engraving carves raised designs on the paper surface, providing a textured effect.
- Are there specific tools for paper engraving, or can regular crafting tools be used?
Specialized tools like engraving pens, cutting mats, and precise cutting instruments are recommended for paper engraving to ensure precision and desired effects.
- Is paper engraving a suitable technique for beginners?
Yes, with practice and patience, beginners can grasp the techniques of paper engraving. Starting with simpler designs and gradually advancing helps in skill development.
- Can engraved paper be used for practical applications, such as invitations or greeting cards?
Absolutely! Engraved paper adds a touch of elegance and sophistication, making it perfect for invitations, cards, and personalized stationery.
- Does paper engraving require any special safety considerations?
While not as hazardous as some other techniques, using cutting tools demands caution. Ensuring proper handling and workspace safety is advisable.
- Can colored paper be used for engraving?
Yes, colored papers can be used for engraving. However, the contrast between the engraved lines and paper color should be considered for optimal visibility.
- Is there a limit to the size of the design that can be engraved on paper?
The size of the design depends on the size of the paper and the precision of the tools used. Larger designs might require multiple sheets or specialized equipment.
- How do I preserve and display my engraved paper artwork?
Frame the artwork using acid-free mats and UV-protective glass to prevent deterioration. Displaying in a controlled environment away from direct sunlight helps maintain the quality.
- Can laser-engraved paper be colored or painted after engraving?
Yes, laser-engraved paper can be colored using paints or markers designed for paper surfaces. However, it's advisable to test on a small area first for compatibility.
Conclusion
In conclusion, paper engraving stands as a meticulous art form, offering a blend of precision, creativity, and intricate detailing. From line and relief engraving to the precision of laser techniques, this craft showcases versatility across various applications, including fine art, stationery, and commercial printing. With specialized tools, careful preparation, and dedication to technique, artists can transform ordinary paper into stunning works of visual artistry.
Whether for personal expression, functional use, or artistic pursuits, paper engraving invites individuals into a world where creativity meets craftsmanship, allowing for endless possibilities and the creation of timeless and remarkable pieces of engraved paper art.