Resin is a versatile material that allows for stunning creative expressions through engraving. Whether you're a beginner or an experienced artisan, this blog aims to equip you with essential tips and techniques to elevate your resin engraving skills.

In this article:
Part 1: Necessary Tips for Engraving Resin
Engraving resin requires a delicate touch and precise techniques to achieve impeccable results. Here are some fundamental tips to set you on the right path:
- Selecting the Right Tools: Choose engraving tools designed for use with resin. Diamond-tipped burrs, rotary tools, or engraving pens are popular choices due to their precision and effectiveness on resin surfaces.
- Safety Precautions: Prioritize safety by wearing protective gear such as goggles, gloves, and a mask to shield against resin dust. Work in a well-ventilated area to avoid inhaling fumes.
- Surface Preparation: Ensure the resin surface is clean and free from dust or debris before engraving. Sanding or polishing the surface can enhance the engraving's quality.
- Design Considerations: Plan your design beforehand. Create templates or markings on the resin surface to guide your engraving, especially for intricate or detailed designs.
- Technique and Pressure: Practice engraving on a scrap piece of resin to master the technique. Maintain a steady hand and vary pressure according to the depth and style of engraving desired.
- Experimentation and Patience: Engraving resin is an art that often requires experimentation. Be patient and allow yourself room for trial and error to refine your skills.
- Finishing Touches: Once the engraving is complete, clean the surface and consider applying a resin sealant or polish to enhance the engraved design's clarity and longevity.
Part 2: How to Engrave Name on Resin?
Engraving names on resin can add a personalized touch to various projects, from jewelry to decorative items. Follow these steps to engrave names onto a resin surface:
Step 1 - Prepare the Resin Surface:
Ensure the resin surface is clean and smooth. Sand or polish the area where you plan to engrave to achieve a flat and even surface.
Step 2 - Design and Marking:
Decide on the font, size, and placement of the name. Use a pencil or a fine marker to lightly sketch the name onto the resin surface as a guide for your engraving.
Step 3 - Select Engraving Tools:
Choose an appropriate engraving tool such as a rotary tool with a fine-tip diamond burr. Ensure the tool is suited for detailed work and precision.
Step 4 - Practice and Technique:
Practice engraving on a scrap piece of resin to familiarize yourself with the tool and perfect your technique. Hold the engraving tool steady and maintain consistent pressure as you follow the marked outline of the name.
Step 5 - Engrave the Name:
Begin engraving the name on the resin surface, following the guidelines you marked. Work slowly and carefully, adjusting the pressure and speed as needed to achieve the desired depth and clarity.
Step 6 - Clean and Refine:
After completing the engraving, clean the surface of any debris or dust. Use a fine-grit sandpaper or polishing compound to refine the engraved area, making the name stand out.
Step 7 - Seal or Finish (Optional):
Consider applying a resin sealant or a clear coat to protect the engraved name and enhance its visibility. This step can also give the resin a glossy finish.
Step 8 - Inspect and Finalize:
Inspect the engraved name to ensure it meets your expectations. Make any necessary touch-ups or refinements before considering the project complete.
Part 3: How to Laser Engrave Resin?
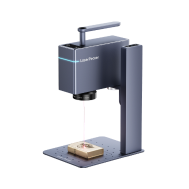
Laser engraving on resin offers precise and detailed results, allowing for intricate designs and customization. Follow these steps to effectively laser engrave on resin:
Step 1 - Prepare the Resin:
Ensure the resin surface is clean, flat, and free from any dust or debris. Place the resin piece securely within the laser engraving machine's designated area.
Step 2 - Select the Right Settings:
Adjust the laser engraving machine settings according to the type and thickness of the resin. Set the appropriate speed, power, and resolution for the desired engraving depth and precision.
Step 3 - Design Preparation:
Create or upload the design or text you want to engrave onto the resin using software compatible with the laser engraving machine. Adjust the size, position, and orientation of the design as needed.
Step 4 - Test Run and Calibration:
Before engraving on the actual resin piece, perform a test run on a similar material or a small section of the resin to ensure the settings and design are correctly calibrated.
Step 5 - Start Engraving:
Initiate the laser engraving process on the resin surface. Monitor the engraving progress closely to ensure the design is coming out as intended. Adjust settings if necessary during the process.
Step 6 - Cooling and Cleaning:
Once the engraving is complete, allow the resin to cool if the process generates heat. Use a gentle brush or air blower to remove any debris or residue resulting from the engraving process.
Step 7 - Finishing Touches (Optional):
Depending on the desired outcome, consider applying a protective coat or resin finish to enhance the engraved design's durability and visibility.
Step 8 - Quality Check:
Inspect the engraved design to ensure it meets your expectations. Make any necessary adjustments or refinements to achieve the desired level of detail and clarity.
Step 9 - Safety Measures:
Always follow safety protocols while operating the laser engraving machine. Use protective eyewear and ensure proper ventilation in the workspace.
Part 4: Hot 10 FAQs About Engraving Resin
Q1: Can any type of resin be engraved?
Engraving is typically feasible on most types of resin, including epoxy, polyester, and polyurethane. However, it's advisable to test on a small area first to ensure compatibility with your engraving tools.
Q2: Which tools are best for engraving resin?
Diamond-tipped burrs, rotary tools, laser engravers, and engraving pens are commonly used for resin engraving due to their precision. Choose tools based on the intricacy and depth of your desired engraving.
Q3: How deep can you engrave into resin?
The depth of engraving depends on various factors, such as the hardness of the resin and the engraving tool used. Typically, engraving depths range from a few millimeters to several millimeters, but this can vary based on the project's requirements.
Q4: Can I engrave detailed designs on resin?
Yes, resin can hold detailed designs well. Laser engraving, in particular, allows for intricate and precise designs on resin surfaces.
Q5: Is it necessary to seal or finish the engraved resin?
While not mandatory, sealing or finishing the engraved resin can protect the design and enhance its appearance. Consider using a resin sealant or a clear coat to preserve the engraving.
Q6: Can I engrave resin without specialized equipment?
Basic engraving on resin can be done with hand tools like rotary tools with appropriate attachments or even improvised tools, but achieving intricate designs may require specialized equipment for better precision.
Q7: How do I avoid chipping or cracking while engraving resin?
Use steady, even pressure and appropriate engraving speeds to minimize the risk of chipping or cracking. Ensuring the resin is adequately cured and using the right tools can also prevent damage.
Q8: Is resin engraving a suitable DIY project for beginners?
Yes, beginners can start with simple designs and gradually progress to more intricate ones. Practice on scrap resin pieces to refine your skills before attempting complex projects.
Q9: Can engraved resin be colored or painted afterward?
Yes, you can add color to the engraved areas using various methods like painting, using pigments, or filling the engraved lines with colored resin to highlight the design.
Q10: Does resin engraving emit harmful fumes?
When engraving resin, it's essential to work in a well-ventilated area and wear appropriate protective gear to minimize inhalation of fumes or dust. Ensure proper safety measures while working with resin.
Conclusion
In conclusion, mastering the art of engraving resin involves a blend of skill, technique, and creativity. From choosing the right tools to understanding the nuances of different engraving methods like hand tools or laser engraving, this craft offers a realm of possibilities for customization and personalization. Whether you're etching intricate designs, names, or patterns onto resin surfaces, patience and practice are key. Embrace experimentation and learn from each project, allowing yourself to refine your skills over time. Remember the importance of safety precautions and surface preparation to ensure optimal results.
With dedication and a willingness to explore the diverse facets of resin engraving, you'll unlock the potential to create captivating, personalized resin pieces that showcase your unique style and craftsmanship. Keep experimenting, refining your techniques, and enjoy the journey of transforming resin into personalized works of art.
