


Engraving ceramic tiles is a captivating way to personalize and add artistic flair to your space. Whether you're looking to create custom designs or intricate patterns, learning how to engrave ceramic tiles can be an engaging and rewarding process.
In this comprehensive guide, we'll introduce how to engrave ceramic tile, and the step-by-step methods, tools required, and creative possibilities involved in engraving ceramic tiles.

In this article:
Part 1: All About Engraved Ceramic Tile
Engraved ceramic tiles bring a unique touch to interior design, offering versatility in embellishing walls, floors, or decorative pieces. Here's what you need to know about these specialized tiles:

- Artistic Expression: Engraving allows for intricate designs, patterns, or personalized imprints on ceramic tiles, providing a platform for artistic expression in home decor or commercial spaces.
- Customization: Whether it's a monogram, a favorite quote, or an elaborate motif, engraved ceramic tiles offer endless opportunities for customization, making them ideal for both functional and aesthetic purposes.
- Durability and Maintenance: Ceramic tiles are renowned for their durability and resilience, and engraved designs can withstand wear and tear while maintaining their beauty. Additionally, they are relatively easy to clean and maintain.
- Applications: Engraved ceramic tiles find use in various settings, from enhancing kitchen backsplashes, bathroom walls, and flooring to creating unique tabletops or artistic installations.
- Techniques and Tools: Various techniques, such as laser engraving or manual etching using specialized tools, are employed to create engraved designs on ceramic tiles. Understanding these techniques is crucial for achieving desired results.
- Design Considerations:Factors like tile type, depth of engraving, and choice of design significantly impact the final outcome. Being mindful of these considerations ensures a successful and visually appealing result.
Part 2: How to Laser Engrave Ceramic Tile?
Laser engraving is a precise and popular method for creating intricate designs on ceramic tiles. Here's a step-by-step guide on how to laser engrave ceramic tiles:
Materials and Tools Needed:
- Ceramic tiles: Choose tiles specifically designed for laser engraving to ensure optimal results.
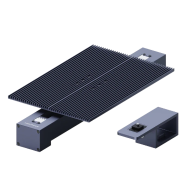
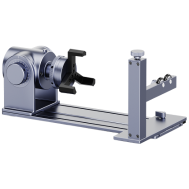
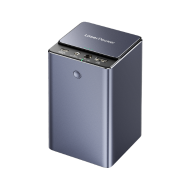
- Laser engraving machine: Use a powerful yet compact laser engraver, preferably with a rotary attachment for curved tiles.
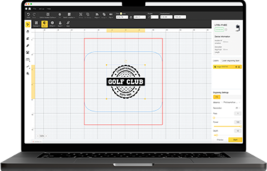
- Design software: Create or import the design you wish to engrave onto the ceramic tile using Design Software.
- Safety gear: Wear protective goggles and gloves to ensure safety during the engraving process.
- Titanium oxide: sprayed on the surface of ceramic tiles to color it.
Steps to Laser Engrave Ceramic Tiles:
Step 1 - Prepare the Tile and Design:
- Clean the ceramic tile surface thoroughly to remove any dirt, dust, or residues that might affect the engraving quality.
- Design or import the desired artwork or pattern into the laser engraving software. Ensure that the dimensions match the size of the tile and adjust as needed.

Step 2 - Set Up the Laser Engraving Machine:
- Power on the laser engraver and ensure all settings are calibrated correctly for ceramic tile engraving.
- Adjust the focus of the laser according to the thickness of the ceramic tile for precise engraving.
Step 3 - Secure the Ceramic Tile:
- Place the ceramic tile securely onto the engraving platform, ensuring it is flat and level to prevent any movement during the engraving process.
- Use masking tape or adhesive putty around the edges of the tile to hold it in place without obstructing the engraving area.

Step 4 - Configure Engraving Settings:
- Set the laser parameters such as speed, power, and resolution according to the material and desired engraving depth.
- Perform test engravings on a spare tile or a small corner of the designated tile to fine-tune the settings and ensure the desired outcome.
Step 5 - Start the Engraving Process:
- Initiate the engraving process through the software, following the design path previously set.
- Monitor the engraving progress to ensure the design is being accurately etched onto the ceramic tile.
Step 6 - Post-Engraving Care:
- Once the engraving is complete, carefully remove the tile from the engraving platform.
- Clean the tile to eliminate any debris or residue from the engraving process. Use a soft brush or cloth along with mild cleaning solutions if necessary.
Step 7 - Optional Finishing Touches:
Apply a sealant or clear coat to protect the engraved design and enhance its longevity if desired.
For more info, please check our LaserPecker CraftZone!


Part 3: Alternative Methods to Engrave Ceramic Tile
There are several alternative methods to engrave ceramic tiles that offer different artistic effects. Let's explore some alternative methods:
Method 1. Manual Etching:
Tools Required: Diamond-tipped engraving tool, stencil (if desired), protective gear (gloves, goggles).
Process:
- Clean the ceramic tile surface thoroughly.
- Secure the tile and stencil (if using one) in place.
- Use the diamond-tipped engraving tool to manually etch the design onto the ceramic tile's surface. Apply consistent pressure while etching to achieve the desired depth.
- Take breaks intermittently to remove debris and ensure clarity in the design.
Method 2. Sandblasting:
Tools Required: Sandblasting equipment, protective gear (respirator, gloves, goggles), stencil or masking material.
Process:
- Prepare the ceramic tile surface and secure the stencil or masking material onto the tile.
- Use a sandblasting machine to blast abrasive materials onto the surface through the stencil, creating the engraved design.
- Control the intensity of the sandblasting for different engraving depths and effects.
Method 3. Chemical Etching:
Tools Required: Etching solution, protective gear (gloves, goggles), stencil or masking material.
Process:
- Clean the ceramic tile thoroughly and place the stencil or masking material onto the desired area.
- Apply the etching solution carefully and precisely onto the exposed surface using a brush or applicator.
- Allow the solution to work for the recommended time, then rinse it off thoroughly and remove the stencil to reveal the engraved design.
Method 4. Engraving Bits with Rotary Tools:
Tools Required: Rotary tool (such as a Dremel), engraving bits, protective gear (gloves, goggles).
Process:
- Clean the ceramic tile surface and secure it in place.
- Attach an appropriate engraving bit to the rotary tool.
- Using the rotary tool, carefully engrave the design onto the ceramic tile's surface, controlling the depth and precision as needed.
Method 5. Decal or Transfer Printing:
Tools Required: Ceramic decals, transfer paper, kiln or heat source.
Process:
- Print or obtain ceramic decals with the desired designs.
- Apply the decal onto the ceramic tile surface using transfer paper.
- Fire the tile in a kiln or apply heat according to the decal manufacturer's instructions to permanently affix the design onto the tile.
Part 4: Hot 10 FAQs About Engraving Ceramic Tile
Q1: Can any ceramic tile be engraved?
Not all ceramic tiles are suitable for engraving. Opt for tiles specifically designed for engraving to ensure better results.
Q2: What's the difference between laser engraving and manual etching?
Laser engraving involves using a laser to precisely etch designs onto the tile, while manual etching requires using tools like diamond-tipped engravers to carve designs by hand.
Q3: Can I engrave already installed ceramic tiles?
It's more practical to engrave tiles before installation, as engraving installed tiles can be challenging and may risk damaging surrounding areas.
Q4: How deep can I engrave into a ceramic tile?
The engraving depth depends on the tile's hardness and the engraving method used. Typically, laser engraving achieves shallow depths, while sandblasting or manual etching can go deeper.
Q5: Can I personalize a ceramic tile with a photo?
Yes, laser engraving can reproduce photos onto ceramic tiles by converting them into grayscale images and using specialized software to etch varying shades.
Q6: Are there limitations to designs that can be engraved on ceramic tiles?
Intricate designs can be engraved, but extremely detailed or small designs might lose clarity, especially in methods like manual etching.
Q7: Can engraved tiles be used in wet areas like bathrooms?
Engraved tiles are suitable for wet areas. Ensure proper sealing or glazing to protect the engraved surface and prevent water damage.
Q8: Is it possible to color or paint engraved designs on ceramic tiles?
Yes, after engraving, it's possible to fill the engraved areas with paint or colorants. Ensure the paint is suitable for ceramic surfaces and follow proper sealing techniques.
Q9: What maintenance do engraved ceramic tiles require?
Regular cleaning using mild detergents and soft brushes is usually sufficient. Avoid abrasive cleaners that might damage the engraved surface.
Q10: Can I engrave on different types of ceramic tiles, like porcelain or glazed tiles?
Engraving techniques may vary based on the tile type. Porcelain and glazed tiles may require adjustments in engraving settings due to their hardness and surface finishes.
Conclusion
In conclusion, engraving ceramic tiles offers a versatile avenue for artistic expression and customization in interior design. Whether through laser precision, manual craftsmanship, or alternative methods, the process allows for personalizing spaces with intricate designs, photos, or patterns. Understanding the nuances of each technique and considering tile types and maintenance needs are crucial for successful outcomes.
With its durability and adaptability, engraved ceramic tiles continue to be a captivating choice for enhancing walls, floors, and decorative elements, offering endless possibilities to transform spaces with personalized and visually stunning creations.