


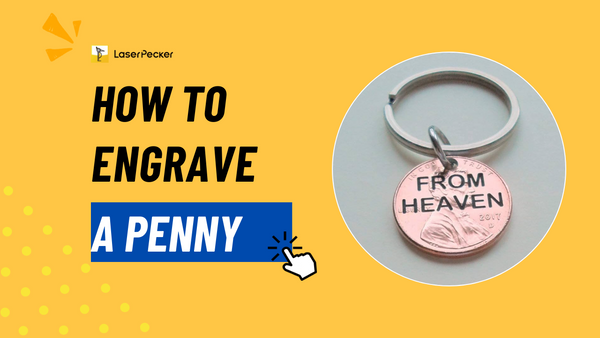
Engraving a penny is a captivating craft that allows individuals to transform a seemingly ordinary coin into a unique work of art. Whether done by hand or with the precision of a laser, the process of engraving offers a creative outlet for personal expression and a chance to leave an indelible mark on a small piece of currency. From choosing the right tools to mastering the techniques, the art of penny engraving is an endeavor that combines patience, skill, and imagination.
In this guide, we will explore the materials needed and detailed steps for both hand and laser engraving, addressing common questions to help enthusiasts embark on this intriguing artistic journey.
In this article:
Part 1: Is It legal to Engrave A Penny?
The legality of engraving a penny may vary depending on your jurisdiction, and it's essential to consider the relevant laws. In the United States, for example, the federal law does not specifically address the engraving of coins for personal use. However, altering currency with the intent to commit fraud or render it unfit for circulation is generally illegal.
The relevant section of the United States Code (18 U.S.C. § 331) states:
"Whoever fraudulently alters, defaces, mutilates, impairs, diminishes, falsifies, scales, or lightens any of the coins coined at the mints of the United States or any foreign coins which are by law made current or are in actual use or circulation as money within the United States, shall be fined under this title or imprisoned not more than five years, or both."
It's important to note that the key terms in this statute are "fraudulently" and "with the intent to defraud." If you are engraving a penny for personal artistic expression and not with the intent to commit fraud or render it unfit for circulation, you are less likely to be in violation of this law.
However, while federal law may not specifically prohibit personal engraving for non-fraudulent purposes, it's crucial to be aware that local laws and regulations can vary. Additionally, altering coins for use as currency or attempting to pass them off as altered for financial gain may have legal implications.
Part 2: How to Laser Engrave A Penny?
Laser engraving a penny can provide precise and intricate designs with minimal effort. Here's a detailed guide on the materials needed and the steps involved in laser engraving a penny:
Materials Needed:
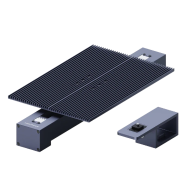
- Laser Engraving Machine:
Choose a laser engraving machine suitable for engraving on metal surfaces. Small diode laser engraving machine is a good choice for beginner.
- Penny:
Select a penny in good condition. The composition of older pennies (pre-1982) is primarily copper, which works well with laser engraving.
- Safety Gear:
Wear appropriate safety gear, including laser safety glasses, to protect your eyes from the laser beam.
- Control Software:
A design software compatible with your laser engraving machine.
Steps for Laser Engraving Penny:
Step 1 - Prepare the Penny:
Clean the penny thoroughly with rubbing alcohol to remove any dirt or oils. Dry it completely with a soft cloth.
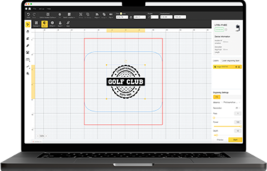
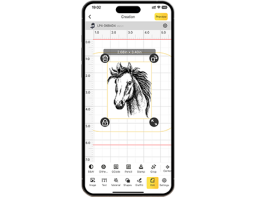
Step 2 - Design Your Engraving:
Using design software compatible with your laser engraving machine, create or import the design you want to engrave. Ensure that the dimensions match the size of the penny.
Step 3 - Import the Design to the Engraving Machine:
Transfer the design to the laser engraving machine by connecting it to your computer or using a USB drive.
Step 4 - Set Up the Laser Engraving Machine:
Follow the manufacturer's instructions to set up the laser engraving machine. This includes adjusting the focus, setting the laser power, and choosing the appropriate engraving speed.
Step 5 - Secure the Penny:
Place the penny on the engraving bed and secure it in place using clamps or a fixture to prevent movement during engraving.
Step 6 - Calibrate the Laser:
Perform a test run to calibrate the laser settings. Adjust the focus and power settings as needed to achieve the desired engraving depth.
Step 7 - Start the Engraving Process:
Initiate the engraving process on the laser machine. The laser will follow the design you've created, etching the pattern onto the surface of the penny.
Step 8 - Monitor the Engraving:
Keep an eye on the engraving process to ensure that it is proceeding correctly. Some laser machines may have a preview option to simulate the engraving before it starts.
Step 9 - Final Inspection:
Once the engraving is complete, carefully inspect the penny for the desired result. The engraved area should be clean and well-defined.
Step 10 - Optional Finishing Touches:
Depending on your preference, you can leave the engraved penny as is or apply additional finishes such as patina or polishing for a customized look.
Part 3: How to Hand Engrave A Penny?
Hand engraving a penny can be a meticulous yet rewarding process, allowing for intricate designs and personal touches. Here's a detailed guide on the materials needed and the steps involved in hand engraving a penny:
Materials Needed:
- Penny:
Choose a penny in good condition, preferably an older one made of copper for easier engraving.
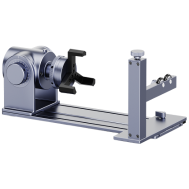
- Engraving Tools:
Gravers: These are specialized engraving tools with sharp, pointed ends. Different gravers are available for various types of cuts and details.
Sharpening Stone: To keep the gravers sharp during the engraving process.
- Safety Gear:
Safety Glasses or Loupe: Protect your eyes from metal shavings.
- Work Surface:
Use a stable workbench or table with a non-slip surface.
- Cleaning Supplies:
Rubbing alcohol and a soft cloth for cleaning the penny before engraving.
Steps for Hand Engraving Penny:
Step 1 - Prepare the Penny:
Clean the penny with rubbing alcohol to remove any dirt or oils. Dry it thoroughly with a soft cloth.
Step 2 - Choose Your Design:
Plan your design before starting. Consider the size of the penny and choose a design that fits well within the limited space.
Step 3 - Secure the Penny:
Use a clamp or a non-slip mat to secure the penny to the work surface. This prevents movement during engraving.
Step 4 - Select the Graver:
Choose the appropriate graver for your design. For fine lines, a narrower graver may be suitable, while broader cuts may require a wider graver.
Step 5 - Sharpen the Graver:
Ensure the graver is sharp using a sharpening stone. A sharp graver allows for cleaner cuts and better control.
Step 6 - Begin Engraving:
Hold the graver at a comfortable angle, and using controlled pressure, start engraving your design. Begin with light cuts and gradually increase the pressure for deeper lines.
Step 7 - Experiment with Techniques:
Try different engraving techniques, such as stippling, cross-hatching, or shading, to add texture and depth to your design.
Step 8 - Clean Periodically:
Pause occasionally to clean the penny and remove any metal shavings. This helps maintain visibility and precision.
Step 9 - Fine-Tune Details:
Pay attention to details as you progress. Adjust the pressure and angle of the graver to achieve the desired effect.
Step 10 - Final Inspection:
Once your engraving is complete, inspect the penny for any imperfections or areas that may need refining.
Step 11 - Optional Finishing Touches:
If desired, you can add patina or polish to enhance the engraved details.
Part 4: Hot 6 FAQs About Engraving A Penny
1. Is it legal to engrave a penny?
Short answer, no. Engraving a penny for personal use as a creative or artistic endeavor is generally legal in many places. However, altering currency with the intent to commit fraud or render it unfit for circulation can be illegal. Always check local regulations and laws to ensure compliance.
2. What tools are commonly used for hand engraving a penny?
Hand engraving often involves using gravers, which are specialized tools with sharp, pointed ends. These gravers come in various shapes and sizes to allow for different types of cuts and details.
3. Can I use any penny for engraving, or are certain years better?
Older pennies made of copper, especially those minted before 1982, are preferred for engraving due to their softer metal composition. The softer metal makes it easier to engrave intricate designs.
4. What type of laser engraving machine is suitable for engraving a penny?
CO2 or fiber laser engraving machines are commonly used for engraving on metal surfaces, including pennies. Ensure that the laser engraving machine is compatible with the material and provides the required precision.
5. Is it possible to engrave both sides of a penny?
Yes, it is possible to engrave both sides of a penny using various engraving techniques. However, precision is crucial, and it may require more advanced tools or techniques, such as a rotary engraving machine.
6. Can I engrave a penny with a regular household tool like a Dremel?
Yes, a Dremel or rotary tool with engraving bits can be used for engraving a penny. Choose fine engraving bits, and practice control to achieve the desired results. It's important to secure the penny and take your time for accurate engraving.
Conclusion
In the realm of creative expression, engraving a penny stands out as a distinctive and accessible form of artistry. The blend of tradition in hand engraving and the precision of modern laser techniques opens up a world of possibilities for those seeking to infuse personal flair into everyday objects.
As we conclude this exploration, we encourage aspiring engravers to embrace the process, to experiment with designs, and to appreciate the beauty that can be etched onto a small, seemingly insignificant canvas. Whether undertaken as a hobby or a serious artistic pursuit, the art of engraving a penny is a testament to the transformative power of creativity and the joy of turning the ordinary into something extraordinary.