


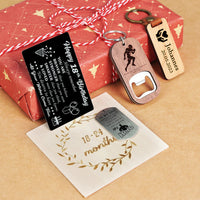

Bottle engraving isn't just about etching designs onto glass; it's a fusion of creativity, precision, and personalization. From custom gifts and special occasions to adding a unique touch to your collection, learning how to engrave a bottle opens up a world of possibilities.
In this series of articles, we'll walk you through the essential steps, tools, and techniques required to carve your creative mark on bottle. From selecting the right type of bottle to mastering the art of engraving patterns, text, and intricate designs, we've got you covered.
In this article:
Part 1: How to Laser Engrave Water Bottles?
Laser engraving water bottles can add a unique and personalized touch to your hydration gear. Here's a step-by-step guide on how to laser engrave water bottles, along with the tools you'll need:
Tools Needed:
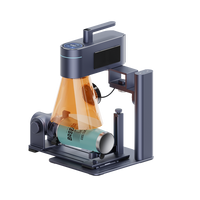
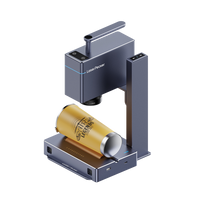
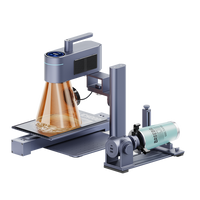
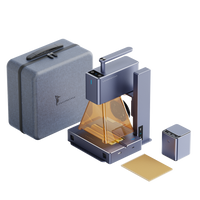
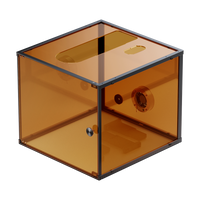
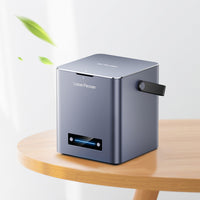
- Laser Engraving Machine:Ensure your machine has sufficient power for engraving on the material of your water bottle. CO2 laser machines are commonly used for engraving on various materials, including metal and plastic.
- Water Bottles:Choose bottles made of materials suitable for laser engraving, such as stainless steel or certain types of plastic.
- Personal Protective Equipment (PPE):Safety glasses protect your eyes from the laser. Gloves prevent burns and ensure a secure grip when handling bottles.
- Design Software:Use vector-based design software like Adobe Illustrator or CorelDRAW to create or import your design.
- Ventilation System:Ensure proper ventilation to disperse any fumes or odors produced during the engraving process.
- Masking Tape:Use masking tape to protect areas of the bottle you don't want to engrave.
- Calipers or Focus Tool:Ensure proper focus by measuring the distance between the laser head and the surface of the water bottle.
Detailed Steps:
Step 1: Choose Suitable Water Bottles
Select water bottles made of materials compatible with laser engraving, such as stainless steel or certain plastics. Ensure the bottles are clean and free of any coatings that might interfere with engraving.
Step 2: Design Your Artwork
Using design software, create or import the artwork you want to engrave onto the water bottle. Ensure the dimensions and placement align with the size and shape of the bottle.
Step 3: Prepare the Laser Engraving Machine
Power on the laser engraving machine and make sure it's properly calibrated.
Set the appropriate laser power and speed settings for the material of the water bottle.
Step 4: Secure the Water Bottle
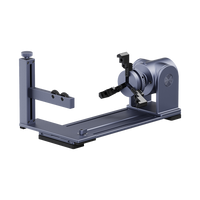
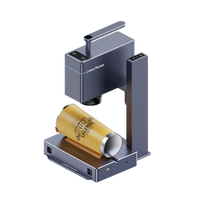
Use a rotary attachment if your machine supports it to rotate the bottle for consistent engraving.
Alternatively, use a fixture or jig to secure the bottle in place during engraving.
Step 5: Focus the Laser
Use calipers or a focus tool to measure and set the correct distance between the laser head and the surface of the water bottle.
Step 6: Masking
Apply masking tape to areas of the bottle that you want to protect from engraving. This helps prevent accidental marks on unwanted areas.
Step 7: Start the Engraving Process
Load your design into the laser engraving software.
Run a test engraving on a scrap piece to ensure the settings are correct.
Once satisfied, begin the engraving process.
Step 8: Monitor the Process
Keep a close eye on the engraving process to ensure the laser is producing the desired results.
If needed, make adjustments to the settings.
Step 9: Remove Masking and Clean
After engraving is complete, carefully remove the masking tape.
Clean the water bottle to remove any residue or debris from the engraving process.
Step 10: Inspect and Finish
Inspect the engraved design to ensure it meets your expectations.
Consider additional steps like applying a sealant or polish to enhance the appearance of the engraving.
Part 2: How to Hand Engrave Wine Bottles?
Hand engraving wine bottles is a craft that requires patience, precision, and attention to detail. Here's a step-by-step guide on how to hand engrave wine bottles along with the tools you'll need:
Tools Needed:
- Glass Engraving Burrs or Diamond Point Bits:These are the cutting tools for engraving on glass. Diamond point bits are recommended for their durability and precision.
- Dremel or Rotary Tool:A Dremel or similar rotary tool with variable speed settings is essential for controlling the engraving process.
- Stencils or Design Templates:Create or acquire stencils or design templates for accurate placement of your engraving on the wine bottle.
- Masking Tape:Use masking tape to create a guide for your engraving and protect areas you don't want to mark.
- Safety Equipment:Safety glasses protect your eyes from glass particles. Dust mask prevent inhalation of glass dust.
- Soft Cloth or Towel:To wipe away dust and debris during the engraving process.
Detailed Steps:
Step 1: Prepare the Wine Bottle
Ensure the wine bottle is clean and free of any labels or residue. Wash and dry the bottle thoroughly.
Step 2: Choose or Create Your Design
Decide on the design you want to engrave. You can create stencils or use design templates to guide your hand.
Step 3: Secure the Bottle
Secure the wine bottle in a stable position using a bottle holder or any fixture that allows you to rotate the bottle easily. This will give you better control during engraving.
Step 4: Apply Masking Tape
Use masking tape to create a guide for your engraving. This will help maintain straight lines and prevent accidental marks on areas you want to keep clear.
Step 5: Set Up the Rotary Tool
Attach the appropriate glass engraving burr or diamond point bit to your Dremel or rotary tool.
Adjust the speed settings based on the type of engraving and the glass thickness.
Step 6: Begin Engraving
Start engraving your design onto the wine bottle, following the lines of your stencil or template.
Use a gentle, controlled motion, allowing the tool to do the cutting. Avoid applying excessive pressure to prevent glass breakage.
Step 7: Clean as You Go
Wipe away dust and debris with a soft cloth or towel regularly. This will help you see your progress and avoid mistakes.
Step 8: Refine Details
Once the main lines of your design are engraved, go back and refine details, adding depth or shading if desired.
Step 9: Remove Masking Tape
Carefully remove the masking tape to reveal your finished engraving.
Step 10: Clean and Inspect
Clean the wine bottle to remove any remaining dust or debris.
Inspect your engraving to ensure it meets your expectations.
Step 11: Optional Finishing Touches
Consider adding additional elements, such as color or metallic accents, to enhance the appearance of your engraving.
Part 3: Hot 6 FAQs About Engraving A Bottle
1. Can I Engrave Any Type of Bottle?
The suitability of a bottle for engraving depends on the material. Glass and certain types of metals (such as stainless steel) are commonly used for engraving. Ensure that the bottle material is compatible with the engraving method you plan to use, whether it's laser engraving, hand engraving, or another technique.
2. What Tools Do I Need for Bottle Engraving?
The tools required for bottle engraving vary based on the method you choose. For laser engraving, you'll need a laser engraving machine, suitable water bottles, personal protective equipment, a computer with design software, ventilation, masking tape, and calipers. Hand engraving requires glass engraving burrs or diamond point bits, a Dremel or rotary tool, stencils or design templates, masking tape, safety equipment, and a soft cloth or towel.
3. Can I Engrave Colored Bottles?
Engraving colored bottles is possible, but the visibility of the engraving may vary. For laser engraving, the laser interacts differently with colored surfaces, affecting the contrast of the engraving. When hand engraving, consider using a design that contrasts well with the bottle color for better visibility.
4. Is Engraving Safe for Bottles Containing Liquids?
Engraving bottles that still contain liquids is not recommended, as it can be unsafe and may damage the engraving equipment. Ensure the bottle is empty and clean before starting the engraving process. For drinkware like wine or water bottles, remove any liquid and thoroughly clean the interior.
5. How Do I Choose the Right Font for Text Engraving?
Selecting the right font is crucial for text engraving. Consider the style and purpose of your engraving. For elegant occasions, cursive or script fonts may be suitable. When engraving on more casual items, clean and simple fonts work well. Ensure the font is legible and complements the overall design of the bottle.
6. Can I Engrave Bottles at Home Without Professional Equipment?
Yes, you can engrave bottles at home without professional equipment. Hand engraving using a rotary tool like a Dremel is a popular DIY method. It allows for artistic freedom and personalization. However, for laser engraving, professional equipment is typically required, and services may be available at specialized shops or online platforms.
Conclusion
In conclusion, bottle engraving is a versatile and creative craft that allows individuals to add a personal touch to various occasions. Whether using laser engraving machines or opting for hand engraving techniques, the key is to choose the right tools, materials, and designs for the best results. Safety precautions should always be observed, and practice is essential to master the art of bottle engraving. Whether it's customizing water bottles, wine bottles, or any other glass or metal container, this craft offers a unique way to express creativity and make memorable, personalized gifts or keepsakes.


