


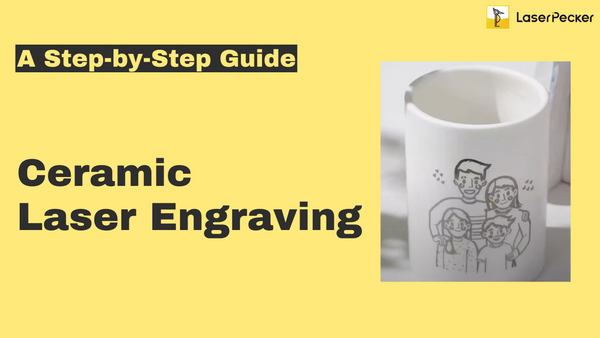
Ceramics have been used by humans for thousands of years to create both practical and decorative objects. With the advance of laser engraving technology, ceramics can now be personalized and decorated with detailed designs and patterns, enabling endless creative possibilities for makers, artists, as well as hobbyists.
In this blog, we will share everything you need to know to get started with laser engraving ceramic. We will explore the laser engraving on ceramics, including the types of ceramics suitable for laser engraving and a step-by-step tutorial of processing ceramics with a visible blue laser engraving machine.
Actually, Ceramic Laser engraving is not easy, as it requires some procedures before and after engraving. Our goal is to help you navigate the learning curve and take your laser engraving skills to the next level.
In this article:
Part 1: What Is Ceramic Laser Engraving?
Ceramic laser engraving involves using a laser beam to etch or mark designs, patterns or text onto ceramic surfaces. This process uses the precision of a laser cutter to selectively remove or modify a thin layer of the ceramic material, creating permanent and detailed engravings.
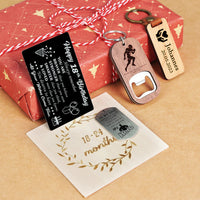
Laser engraving on ceramic is valued for its ability to produce intricate and permanent markings without the need for physical contact. It's often used to personalize ceramic items such as tiles, mugs, plates and decorative pieces. The results often include sharp detail, fine lines and a clean, professional appearance.
Part 2: What Types of Ceramics Are Suitable for Laser Engraving?
The most suitable types of ceramics for laser engraving are those that have a high contrast between the surface and the underlying material. Some common types of ceramics that are suitable for laser engraving include porcelain, stoneware, and glazed ceramics.
(From top to bottom: Porcelain, Glazed ceramics and Stoneware. Source: Wiki)
To achieve optimal outcomes when engraving ceramic, it's preferable to work with ceramics boasting a smooth and non-porous surface. Materials like stoneware, porcelain, and glazed ceramics tend to yield superior results compared to raw earthenware or terra cotta.
Additionally, an even, fine-grained, and minimally flawed composition is essential for success. When opting for laser engraving on ceramic tiles, plates, or bowls, simpler geometric shapes often result in more uniform engravings compared to intricate forms.
Part3: 4 Steps to Make Laser Engraving on Ceramic
Step1: Choose the right Ceramic Laser Engraving Machine
Choosing the right ceramic laser engraving machine is a pivotal initial move to guarantee the triumph of your engraving projects. Elements such as laser power, precision, resolution, and engraving speed can significantly impact the ultimate outcome. Making thoughtful decisions on these aspects is key to achieving the desired results in your ceramic engraving endeavors.
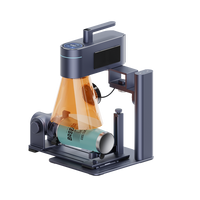
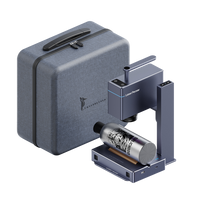
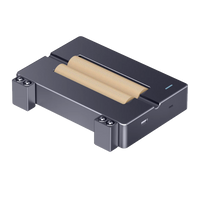
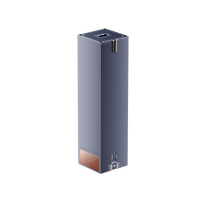
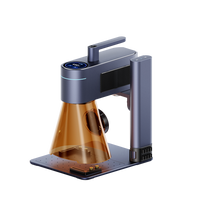
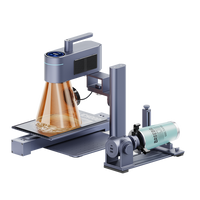
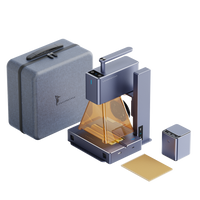
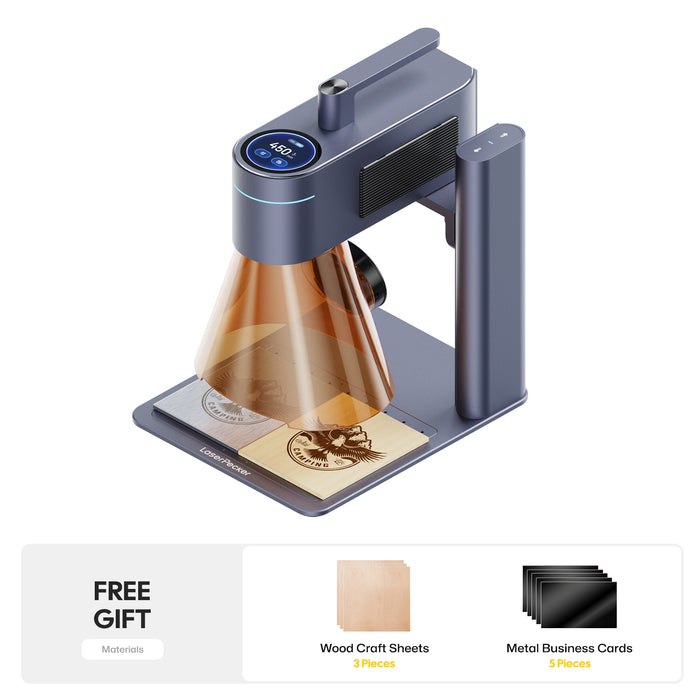
Here, we recommend using the LaserPecker 2 (LP2). This portable and convenient laser machine can help you achieve your engraving goals with ease. The LaserPecker LP2, offers a 5-watt, 450nm blue light laser with an engraving speed of 6mm/s-600mm/s, high accuracy of 0.05mm, and maximum 2K resolution.

LaserPecker 2 (LP2) - Portable and Handleable Laser Engraver
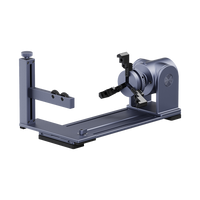
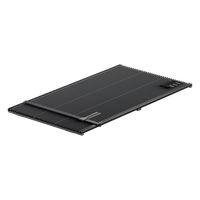
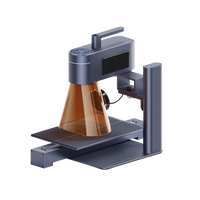
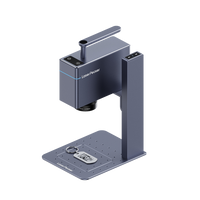
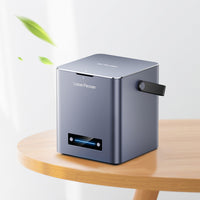
If you pursue better engraving experience and more usage scenario, you can try machine like LaserPecker 4 (LP4).
LaserPecker 4 (LP4) - The World's First Dual-laser Engraver for Most Materials
Step2: Use a Black Engraving Paper to Cover the Surface
The most effective way to do laser engrave on porcelain is to use black engraving marking paper, which allows you do laser engraving on tile without paint. Its tight surface can completely cover the cup, allowing it to absorb the energy from the laser light.
Firstly, you need to prepare the ceramic cup, engraving paper and a pair of scissors.
Secondly, Wrap the cup in the engraving paper, measure the approximate length and area, and cut off any excess with scissors.
Thirdly, Wet the engraving paper with water to make it easier to tear off.
Fourthly, Tear off a small part of the engraving paper and paste it onto the surface of the cup. Roll the cup to ensure that it is completely covered by the engraving paper. Squeeze the black engraving paper to ensure a flat surface without any bubbles or folds.
*Alternative to Engraving Paper - Use Black Marker
This method is the most cost effective compared to engraving paper. It only needs to cover the ceramic surface with a black marker. The blackr color helps to absorb the energy emitted from blue light laser and leaves marks on the surface.
However, choosing a suitable marker for this process can be a bit tricky. The marker should fully cover the surface with black color, but some markers, especially on curved surfaces, may leave white spaces after painting. When painting the mug, some markers would erase the black color and turn this area into white again and badly damage the final result. Here is a negative example of painting the cup, which should be avoided:
Step3: Adjust the Ceramic Laser Engraving Machine
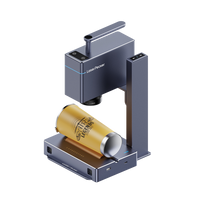
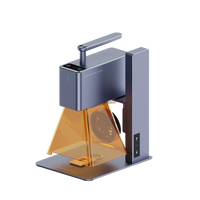
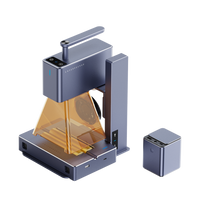
After painting the surface of the cup, assemble the LaserPecker LP2 by tightening two screws. One screw is used to stabilize the electric stand, while the other is used to secure the machine.
Next, connect the power cord to the machine, which is located on the right in the picture below. The machine's light will turn on if it is charged. Next, connect the wire between the machine and the electric stand, which is located in the middle of the picture, to provide power to the stand so that you can adjust its height.
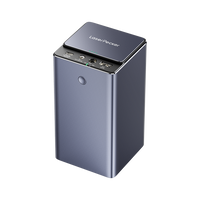
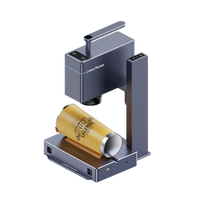
Next, since we will be engraving on a cylindrical cup, we will need the LP2 Electrical Roller. Connect the wire between the machine and the roller. Please note that the LaserPecker logo on the roller accessory should be facing the same direction as the logo on the engraving plate to ensure a consistent engraving direction.
LaserPecker 2 Versatile Electric Roller
Then, connect the LP2 to your app via Bluetooth, and turn on the Versatile Electrical Roller. Upload the pattern into the app, making sure that the direction of the pattern is correct. For example, if the cup mouth is on your left, the top of the pattern you want to engrave should be on your right side. You can also choose to invert the color if desired.
Then, set the focal length by putting down the L-shaped ruler to touch the surface of engraving area (or just measure the 11cm distance between machine and the surface).
Finally, You can preview the engraving area and make adjustments to the engraving size by pulling and stretching the pattern on your app.
After previewing, click "send file" with a 2K resolution and set the final engraving parameters. Since the LaserPecker LP2 has a 5-watt power and a range of engraving speeds between 6mm/s-600mm/s, we recommend using 100% power and a depth of 9% with 1 pass.
Step4: Engrave on Ceramic With Laser Now!
Now you can start engraving. After you finish engraving, gently tear off the engraving paper with a brush, and your engraving is complete! The pattern is still waterproof and can afford slight scratching.
FAQs: Hot Questions about Ceramic Laser Engraving
Q1: Can you explain the process of ceramic laser engraving?
Ceramic laser engraving involves using a laser to etch or mark designs onto ceramic surfaces. The laser emits a focused beam of light that interacts with the ceramic, creating precise and detailed engravings.
Q2: Is laser engraving on ceramic permanent?
Yes, laser engraving on ceramic is generally permanent. The laser physically alters the surface of the ceramic, creating a lasting mark that withstands wear and tear.
Q3: Are there any limitations to laser engraving ceramic tiles?
While laser engraving on ceramic tiles is highly effective, intricate designs and fine details may be challenging on certain types of tiles. It's advisable to test the specific ceramic tile before proceeding with complex engravings.
Q4: Can you laser engrave ceramic mugs without damaging them?
Yes, it's possible to laser engrave ceramic mugs without causing damage. Specialized laser settings and techniques are employed to ensure precise engraving without compromising the integrity of the mug.
Q5:Can you laser engrave ceramic tiles without paint?
Yes, laser engraving ceramic tiles without paint is feasible. Using the black engraving paper, you can do ceramic laser engraving without the need for additional paint.
Q6:What types of lasers are suitable for ceramic engraving?
Common ceramics like stoneware and porcelain are made primarily of clay minerals, feldspar, and quartz. These ceramics can be engraved using infrared lasers, especially fiber lasers and CO2 lasers with wavelengths of 10600 nm and 1064 nm, respectively. However, visible wavelength lasers, especially blue diode lasers around 445 nm, yield better results for ceramic engraving.
Q7:Why blue diode laser is the best choice for ceramic engraving?
A blue diode laser with its shorter wavelength, achieving a 0.07 mm beam diameter, is ideal for detailed ceramic engraving. Requiring 10-15 watts of power, it minimizes heat, reduces damage, and outperforms infrared lasers on ceramics.


2 comments
Fernando Botto comment.created_at: comment.updated_at:
Hi there,
Can I use the eletric roller of the LP2 in the LP4? Can that work? Need to print big flat materials like a skate board but only got the LP4. Tks
Rex Hang comment.created_at: comment.updated_at:
Ceramic’s adaptability shines in various applications, but engraving can pose challenges. This blog suggests innovative solutions like the blue light laser and white paint method or LaserPecker LP2, catering to budget-conscious hobbyists. Explore ceramic creativity with HeatSign insights