


Laser cutting acrylic has become a valuable technology in various industries, from signage and design to manufacturing and prototyping.
This comprehensive guide will take you through the process of laser cutting acrylic, addressing common questions, considerations, and specific steps involved in achieving precise and high-quality results. Whether you're an amateur, or a professional, this guide covers the key aspects. Read on!
In this article:
Part 1: What is Laser Cutting Acrylic?
Laser cutting acrylic is a process in which a laser beam is used to precisely cut or engrave acrylic sheets. Acrylic, also known as Plexiglas or Perspex, is a transparent thermoplastic material widely used for various applications such as signage, displays, architectural models, and more.
Laser cutting acrylic offers several advantages, including:
- Precision: Laser cutting provides high precision, allowing for intricate designs and fine details.
- Versatility:It can cut through a variety of acrylic thicknesses, and the process is suitable for both simple and complex shapes.
- Efficiency:Laser cutting is a fast and efficient process, making it suitable for both prototyping and production.
- Clean Edges: The edges of laser-cut acrylic are typically smooth and do not require additional finishing.
- Minimal Material Waste: Laser cutting minimizes material waste, as the focused laser beam follows the programmed cutting path closely.
Part 2: How to Laser Cut Acrylic - Step by Step Guide
Laser cutting acrylic involves several steps to ensure a successful and precise result. Here's a step-by-step guide:
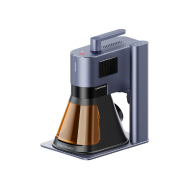
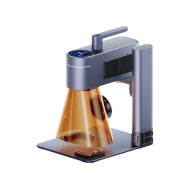
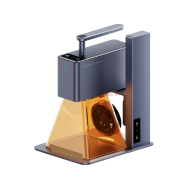
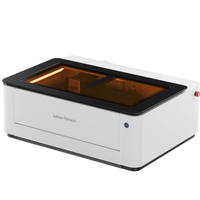
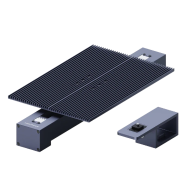
Step 1. Choose a Desktop Laser Cutter:
Purchase a desktop laser cutter like LaserPecker LX2, which is suitable for acrylic laser cutting at home.
It is worth mentioning that laser cutting colored acrylic is a better choice. If you want to cut clear acrylic, you'll need the help of some water-soluble paint.
Step 2. Prepare the Acrylic Sheet:
Ensure that the acrylic sheet is clean and free from any protective films or debris. Place the sheet on the laser cutting bed, ensuring it is flat and securely positioned.
Step 3. Set Up the Laser Cutting Machine:
The process of cutting acrylic can produce toxic fumes, so it is important to follow safety guidelines, wear protective gear, and work in a well-ventilated area.
Turn on the laser cutting machine and ensure that it is properly calibrated. Adjust the laser settings based on the type and thickness of the acrylic. Typical settings include laser power, cutting speed, and focus. Consult the machine's manual for specific recommendations.
Step 4. Design and Import the File:
Create a digital file of the design you want to cut. The file should specify the cutting paths, shapes, and any engraving details.
Load the digital design file into the laser cutting machine's software. Position the design on the acrylic sheet, ensuring it fits within the machine's working area.
Step 5. Focus the Laser:
Adjust the focus of the laser beam based on the thickness of the acrylic sheet. This is crucial for achieving clean and precise cuts.
Step 6. Preview and Test:
Use the machine's software to preview the cutting path. Perform a test run on a scrap piece of acrylic to ensure that the settings are correct and that the laser is cutting as expected.
Step 7. Set Up Exhaust System:
Ensure that the laser cutting machine's exhaust system is properly set up to remove fumes and debris generated during the cutting process. This helps maintain a clean and safe working environment.
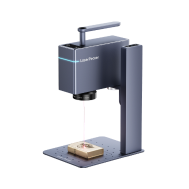
Step 8. Start and Monitor the Laser Cutting Process:
Once satisfied with the test results, start the laser cutting process. The machine will follow the programmed cutting paths, and the laser beam will melt or vaporize the acrylic along those paths.
Keep an eye on the laser cutting process to ensure that it proceeds smoothly. If necessary, pause or stop the machine to address any issues that may arise.
Step 9. Inspect and Remove the Cut Pieces:
After the cutting is complete, carefully remove the acrylic pieces from the cutting bed. Inspect the edges for smoothness and the overall quality of the cut.
Step 10. Post-Processing and Clean Up:
Depending on your project, you may need to perform additional steps such as removing any protective masking on the acrylic surface or applying finishing touches.
Clean the laser cutting machine and the work area. Dispose of any waste materials appropriately.
Part 3: FAQs about Laser Cut Acrylic
1. Can laser cutters engrave acrylic?
Yes, laser cutters equipped with engraving capabilities can engrave designs onto acrylic surfaces. This allows for decorative or informational markings on acrylic pieces.
2. What types of acrylic can be laser cut?
Laser cutters can generally cut through various types of acrylic, including cast acrylic and extruded acrylic. However, some variations in composition may affect cutting parameters.
3. What thickness of acrylic can be laser cut?
Laser cutters can handle a range of acrylic thicknesses. The specific machine's power and settings will determine the maximum thickness it can effectively cut.
4. Can laser cutting acrylic create toxic fumes?
Yes, laser cutting acrylic can produce potentially harmful fumes. It is important to use the laser cutter in a well-ventilated area or with an exhaust system to remove fumes.
5. Can laser cutting acrylic be used for mass production?
Yes, laser cutting acrylic is suitable for both prototyping and mass production. Its efficiency, precision, and minimal material waste make it a viable option for large-scale manufacturing.