


In a world filled with cookie-cutter items, there's something special about making everyday objects uniquely yours. One delightful way to achieve this is by exploring the world of spoon engraving. This DIY guide is your ticket to transforming a plain utensil into a customized masterpiece, blending practicality with a dash of creativity.
Whether you're a seasoned DIY enthusiast or just getting started, this step-by-step journey is designed for everyone. It's about turning a regular spoon into a personalized work of art, adding a touch of charm to your kitchen essentials.
So, let's embark on this creative adventure together. From choosing the right tools to perfecting your technique, each step brings us closer to creating something special. Whether you're crafting a thoughtful gift or just adding flair to your kitchen, spoon engraving is an accessible art form that lets your creativity shine.
In this article:
Part 1: How to Engrave A Spoon: A Step-by-Step Guide
Section 1: Materials Needed
Before diving into the enchanting world of spoon engraving, it's essential to gather the right tools. Here's a checklist of materials you'll need:
- Spoon:Choose a spoon made of a material suitable for engraving, such as stainless steel or silver. Ensure it's clean and free from any residues.
- Engraving Tools: Depending on your chosen technique, gather the necessary engraving tools. This may include hand engraving tools, electric engravers, or laser engravers.
- Safety Gear:Protect yourself during the engraving process. Wear safety goggles to shield your eyes from any debris, and use a mask to avoid inhaling fumes if using chemical etching solutions.
- Design Transfer Materials:If you have a specific design in mind, you'll need materials like transfer paper or stencils to transfer the design onto the spoon's surface.
Section 2: Preparation
Now that you have your materials ready, it's time to prepare for the engraving process. Follow these steps:
- Clean the Spoon: Ensure the spoon is thoroughly cleaned and dried. Any dirt or residue on the surface can affect the engraving quality.
- Secure the Spoon: To avoid unnecessary movement during engraving, secure the spoon in place. You can use clamps or a vice to hold it steady on your work surface.
- Create a Design: If you haven't already, decide on a design for your spoon. It could be initials, a special date, or a unique pattern. Sketch the design on paper before transferring it onto the spoon.
- Transfer the Design:Use transfer paper or stencils to transfer your design onto the spoon. This step ensures accuracy and helps guide your engraving process.
Section 3: Choosing the Right Engraving Technique
There are various techniques for engraving spoons, each with its own set of advantages and challenges. Let's explore the most common methods:
- Hand Engraving: This traditional method involves using handheld tools to carve the design onto the spoon's surface. It provides a high level of precision but requires a steady hand and patience.
- Electric Engraving: Utilizing an electric engraving tool makes the process faster and may be more suitable for intricate designs. It's essential to practice control when using power tools to avoid overdoing the engraving.
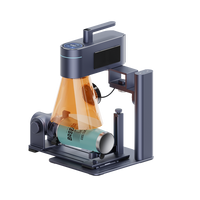
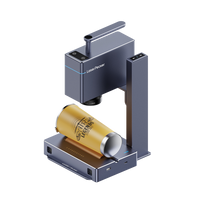
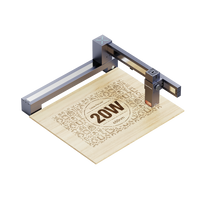
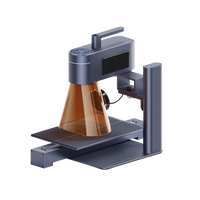
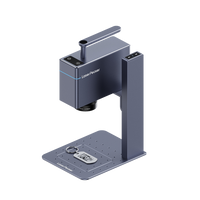
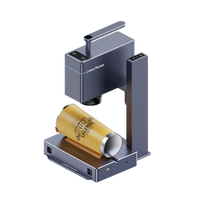
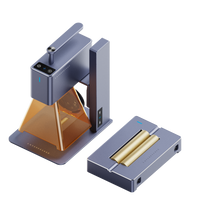
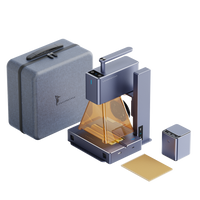
- Laser Engraving: Laser engraving is the process of selectively removing microscopic layers of material, thus creating visible marks on the treated surface. Depending on the materials, the laser-material interactions can be different.
Section 4: Step-by-Step Instructions
Now that you're all set up and prepared, let's delve into the step-by-step process of engraving a spoon:
- Prepare the Engraving Tool:
If using a hand engraving tool, ensure it's sharp and well-suited for your chosen design.
If using an electric engraver, adjust the speed and depth settings according to the material and design.
- Start with Light Strokes:
Begin engraving with light strokes to outline the design. This helps you establish the placement and direction of your engraving.
- Progress to Deeper Engraving:
Once the outline is set, gradually increase the pressure or depth of the engraving tool to achieve the desired depth for your design.
- Take Breaks to Inspect:
Regularly stop and inspect your progress to ensure the design is coming out as intended. This is especially important for intricate patterns.
- Refine and Clean Edges:
After completing the main engraving, refine the edges and details of your design. Use finer tools or attachments for electric engravers for precision.
- Remove Residue:
Clean the spoon to remove any engraving residue or debris. A soft brush or cloth can help clear away particles without damaging the engraved surface.
Section 5: Tips and Tricks
Enhance your spoon engraving experience with these valuable tips:
- Practice on Scrap Material:Before engraving the actual spoon, practice on a scrap piece of the same material to get a feel for the tools and techniques.
- Stabilize Your Hand:Maintain a steady hand by resting your forearm on the table. This reduces hand tremors and enhances control during the engraving process.
- Use Templates for Complex Designs:For intricate designs, consider using templates or stencils. This ensures accuracy and saves time compared to freehand engraving.
- Experiment with Different Techniques:Don't hesitate to try various engraving techniques to discover what works best for you. Each method has its unique advantages and challenges.
- Work in Good Lighting:Engraving requires precision, so ensure you have ample lighting to clearly see your work. Natural light or adjustable lamps are ideal.
Section 6: Safety Precautions
Engraving involves tools and materials that require careful handling. Follow these safety precautions to ensure a secure working environment:
- Wear Protective Gear:Always wear safety goggles to protect your eyes from flying debris, and use a mask if working with chemical etching solutions.
- Work in a Well-Ventilated Area:If using chemical etching, ensure you work in a space with good ventilation to avoid inhaling fumes.
- Secure Loose Clothing:Avoid loose clothing or accessories that could get caught in the engraving tools, potentially causing accidents.
- Keep First Aid Kit Handy:Have a first aid kit nearby in case of any minor injuries. Engraving involves sharp tools, and it's crucial to be prepared for unexpected situations.
By following these step-by-step instructions and incorporating useful tips, you'll be on your way to creating beautifully engraved spoons. The safety precautions ensure that your DIY project remains a positive and injury-free experience.
Part 2: Hot 6 FAQs About Engraving A Spoon
1. What Tools Are Essential for Spoon Engraving?
Basic tools include a suitable spoon, engraving tools, safety gear, and design transfer materials.
2. Can Any Spoon Be Engraved?
Opt for materials like stainless steel or silver. Ensure the spoon's surface is clean and smooth.
3. Is Spoon Engraving Beginner-Friendly?
Absolutely! Beginners can achieve impressive results with the right tools and a bit of practice.
4. Which Engraving Technique Should I Choose?
Consider hand engraving for precision, electric engraving for efficiency, or chemical etching for unique designs.
5. Do I Need Design Skills for Spoon Engraving?
Not necessarily. Start with simple designs and use templates or stencils to assist.
6. How Do I Care for Engraved Spoons?
Clean with care using a soft brush or cloth. Avoid abrasive cleaners to preserve the engraved design. Regular maintenance ensures longevity.
Conclusion
Embarking on the journey of spoon engraving unveils a world where everyday utensils transform into personalized works of art. As we've navigated through the hot FAQs, it's evident that spoon engraving is not just a craft; it's an accessible and rewarding experience for enthusiasts of all levels.
So, whether you're infusing sentiment into a gift or elevating your kitchen aesthetics, spoon engraving stands as an art form accessible to all. Each stroke, question, and care tip contributes to a unique journey, turning an ordinary spoon into a cherished keepsake.


