


Coin engraving is a revered craft that has been practiced for centuries, blending artistry with precision to create unique and personalized pieces. Engraved coins hold historical significance and are often cherished as tokens of accomplishment, remembrance, or celebration. This guide aims to delve into the intricate world of coin engraving, offering insights and techniques for enthusiasts to master this timeless art form.
Engraved coins go beyond mere aesthetics; they serve as tangible expressions of individuality and creativity. From commemorating special occasions to serving as cherished gifts, engraved coins find their place in various aspects of life. Understanding the significance of this art form adds depth to the journey of mastering coin engraving.
In this article:
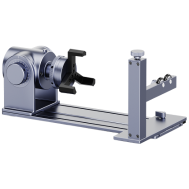
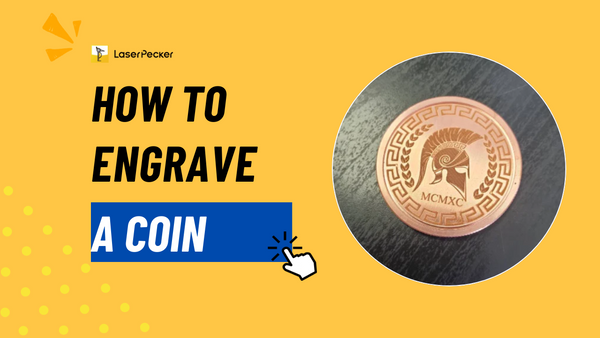
Part 1: How to Laser Engrave A Coin?
Materials and Tools Needed:
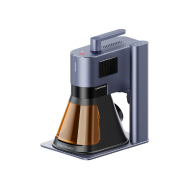
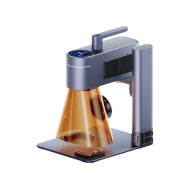
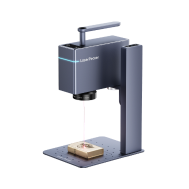
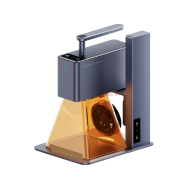
- Laser Engraving Machine: Ensure it's suitable for coin engraving and has the necessary power and precision.
- Coins: Choose coins made of materials compatible with laser engraving, such as copper, brass, or silver.
- Safety Equipment: Safety goggles to protect your eyes from laser radiation.
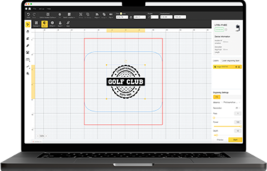
- Design Software: Prepare or import the design you want to engrave.
- Ventilation System: If engraving produces fumes, ensure proper ventilation in your workspace.
Step-by-Step Guide:
- Prepare Your Workspace:
Set up the laser engraving machine in a well-ventilated area.
Place the coin in the machine's engraving bed securely.
- Install and Focus the Laser:
Install the appropriate lens for coin engraving.
Use the machine's focusing tool to ensure the laser is precisely focused on the coin's surface.
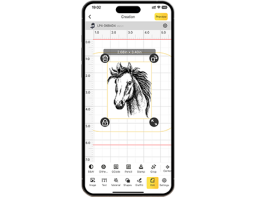
- Import or Create the Design:
Use design software to create or import the design you want to engrave on the coin.
Adjust the design's size, position, and orientation to fit the coin.
- Calibrate the Machine:
Calibrate the laser engraving machine based on the material and size of the coin.
Set the appropriate laser power and speed settings for your specific engraving requirements.
- Test Engraving:
Before engraving the actual coin, perform a test engraving on a similar material to ensure the settings are correct.
Adjust power, speed, and focus if needed based on the test results.
- Secure the Coin:
Ensure the coin is securely fixed in the engraving bed to prevent movement during the process.
- Start the Engraving Process:
Load the prepared design into the laser engraving machine's software.
Double-check all settings and parameters.
Initiate the engraving process.
- Monitor the Engraving:
Keep a close eye on the engraving process to ensure it's proceeding as planned.
Address any issues promptly, such as material movement or uneven engraving.
- Post-Engraving Inspection:
Once the engraving is complete, carefully inspect the coin.
Clean off any debris or residue from the engraving process.
- Finishing Touches:
Consider additional steps for enhancing the engraved coin, such as applying a protective coating or adding color.
- Documentation and Portfolio:
Document your settings and process for future reference.
Capture high-quality images of the engraved coin for your portfolio or sharing on social media.
Safety Precautions:
- Wear Safety Goggles: Protect your eyes from laser radiation by wearing appropriate safety goggles.
- Ventilation: If the engraving process produces fumes, ensure proper ventilation in your workspace.
- Follow Manufacturer's Guidelines: Adhere to the safety guidelines and recommendations provided by the laser engraving machine manufacturer.
Part 2: How to Engrave A Coin Using Dremel?
Materials and Tools Needed:
- Dremel Rotary Tool: Choose a model with variable speed settings for more control.
- Engraving Bits: Select appropriate engraving bits for the desired design and material.
- Coins: Choose coins made of softer metals like copper or brass for easier engraving.
- Safety Equipment: Safety goggles and a dust mask to protect your eyes and lungs.
- Stencils or Design Template: Create or obtain a stencil or design template for your engraving.
- Workbench or Clamp: Secure the coin in place using a workbench or clamp.
Step-by-Step Guide:
- Prepare Your Workspace:
Set up a well-lit and well-ventilated workspace.
Secure the coin in place using a workbench or clamp.
- Choose and Insert Engraving Bit:
Select an engraving bit based on the design and level of detail you want.
Insert the chosen bit into the Dremel's collet.
- Adjust Dremel Speed:
Set the Dremel to a medium speed initially. Adjust as needed for control and precision.
- Create or Obtain Design Template:
Draw your design directly onto the coin or create a stencil/template for guidance.
- Secure the Coin:
Clamp the coin securely to prevent movement during engraving.
- Practice on Scrap Material:
If you're new to using a Dremel for engraving, practice on a scrap piece of similar material to get a feel for the tool and refine your technique.
- Start Engraving:
Begin engraving your design on the coin, following the lines of your stencil or template.
Hold the Dremel like a pencil for better control.
- Control Depth and Pressure:
Control the depth of your engraving by adjusting the pressure applied to the Dremel.
Light, consistent pressure is generally more effective than heavy pressure.
- Clean as You Go:
Periodically stop and clean away any debris with a brush or cloth to maintain visibility of your work.
- Adjust Speed for Detail:
For intricate details, lower the Dremel speed to enhance control.
- Add Personal Touch:
Consider adding initials, dates, or additional details to personalize the engraving.
- Inspect and Refine:
Regularly inspect your progress and refine details as needed.
Make any necessary adjustments to the Dremel speed or pressure.
- Final Inspection:
Once the engraving is complete, inspect the coin for any imperfections or areas that may need touch-ups.
- Clean the Coin:
Clean the engraved coin with a soft brush to remove any remaining debris.
- Optional Finishing:
Optionally, apply a protective coating or polish to enhance the appearance of the engraved coin.
Safety Precautions:
- Wear Safety Gear: Always wear safety goggles and a dust mask to protect your eyes and lungs from debris.
- Secure Workpiece: Ensure the coin is securely clamped to prevent movement during engraving.
- Take Breaks: Take breaks as needed to prevent hand fatigue and maintain precision.
- Follow Dremel Guidelines: Adhere to safety guidelines provided by the Dremel tool manufacturer.
Part 3: Hot 6 FAQs About Engraving A Coin
1. Can I Engrave Historic or Valuable Coins?
Engraving historic or valuable coins is generally discouraged, especially if the coins hold significant collector's value. Altering such coins can diminish their historical or numismatic worth. Instead, consider using replicas or coins with minimal collector value for engraving projects, preserving the integrity of valuable numismatic pieces. Always research and consult experts before engraving potentially valuable coins.
2. Can I Engrave Any Type of Coin?
While it's possible to engrave various types of coins, it's essential to consider the coin's material. Softer metals like copper and brass are generally more suitable for engraving. Avoid coins made of hard materials that may damage your engraving tools.
3. Do I Need Artistic Skills to Engrave a Coin?
While artistic skills can enhance your designs, they are not strictly necessary. You can start with simple designs and gradually improve your skills through practice. Many engravers use stencils or templates to guide their work, making it accessible for individuals with varying levels of artistic ability.
4. Is Coin Engraving Safe?
Yes, coin engraving can be safe if proper safety precautions are followed. For laser engraving, wear safety goggles and ensure proper ventilation. When using a Dremel, wear safety goggles and a dust mask to protect your eyes and lungs. Always follow the safety guidelines provided by the specific engraving tools you are using.
5. Can I Engrave Both Sides of a Coin?
Engraving both sides of a coin is possible but may require careful planning. Consider the thickness of the coin and the depth of your engravings to avoid damaging the opposite side. Some engravers choose to engrave only one side to preserve the coin's structural integrity.
6. How Do I Preserve an Engraved Coin?
Preserving an engraved coin involves protecting it from tarnish and wear. For laser-engraved coins, applying a clear coat or protective finish can help. For Dremel-engraved coins, consider storing them in a protective case or applying a gentle polish. Avoid using harsh chemicals that may damage the engraved surface.
Conclusion
In conclusion, coin engraving is a captivating art form that blends precision and creativity, offering a unique way to express individuality and commemorate special moments. Whether utilizing laser engraving machines or employing the hands-on approach with tools like the Dremel rotary tool, enthusiasts can embark on a rewarding journey of craftsmanship.
As you delve into the intricate world of coin engraving, remember to prioritize safety, practice diligently, and explore various techniques to refine your skills. Whether you're a seasoned artist or a beginner, the art of engraving invites you to leave a lasting mark on coins, turning them into cherished and personalized works of art.