


Engraved candles, with their delicate craftsmanship and personalization, have become much more than mere sources of light. These candles serve as tangible vessels for emotions, sentiments, and cherished memories, adding a unique touch to various aspects of life.
From commemorating special occasions to enhancing the ambiance of a space, engraved candles hold a timeless appeal. In this exploration, we delve into the diverse uses of engraved candles, uncovering the myriad ways in which these personalized luminaries contribute to the beauty and significance of our lives.

In this article:
Part 1: How to Engrave A Candle By Hand?
Engraving a candle by hand can be a creative and personalized way to add a special touch to your candles. Here's a step-by-step guide on how you can engrave a candle by hand:
Materials you'll need:
- Candle: Choose a smooth and plain candle for better engraving results.
- Engraving tool: You can use various tools for engraving, such as a fine-point knife, wood carving tools, or a specially designed candle engraving tool.
- Design or pattern: Decide on the design or pattern you want to engrave on the candle. You can draw it freehand or use a stencil.
Steps:
- Prepare your workspace:
Make sure you have a clean and stable surface to work on.
Place a protective covering on the surface to catch any wax shavings or debris.
- Choose your design:
Decide on the design you want to engrave. Simple designs or initials work well for beginners.
- Mark the design on the candle:
Use a pencil to lightly mark the design on the candle's surface. This will serve as a guide for your engraving.
- Start engraving:
Hold the engraving tool at a slight angle to the candle's surface.
Begin carving along the pencil lines, applying gentle and even pressure.
Take your time, and don't rush the process. It's better to engrave slowly and achieve clean lines.
- Clean as you go:
Periodically clean off any wax shavings from the candle to ensure a clear view of your progress.
- Fine-tune details:
Once the main lines are engraved, go back and add any finer details or shading to enhance the design.
- Test your design:
After completing the engraving, light the candle to see how the design looks when illuminated. This will help you identify any areas that may need additional attention.
- Seal the engraving (optional):
If you want to protect the engraved design, you can consider applying a thin layer of clear sealant or wax over the engraved area.
Part 2: How to Engrave A Candle Using Laser Engraver?
Engraving a candle using a laser engraver can provide precise and intricate designs. Here's a step-by-step guide on how to engrave a candle using a laser engraving machine:
Materials and Tools:
- Candle: Choose a candle made of materials suitable for laser engraving, such as soy or paraffin wax.
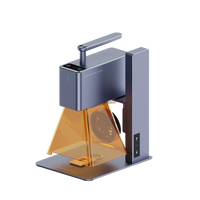
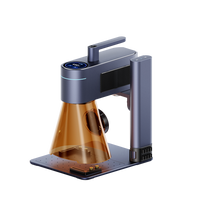
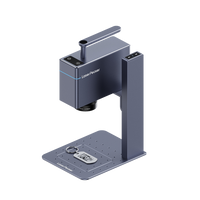
- Laser Engraving Machine: Ensure that your laser engraver is equipped to handle cylindrical objects like candles.
- Vector Design Software:Prepare or choose a vector design to be engraved on the candle.
- Safety Gear: Wear appropriate safety gear, including safety glasses, when operating the laser engraving machine.
Steps:
- Select and Prepare the Candle:
Choose a smooth and clean candle for engraving. Ensure the candle's surface is free from dust or debris.
- Create or Import Design:
Use vector design software (such as Adobe Illustrator or CorelDRAW) to create or import the design you want to engrave on the candle.
- Set Up the Laser Engraving Machine:
Adjust the laser engraving machine settings based on the material of the candle and the desired engraving depth. Follow the manufacturer's guidelines for setting up cylindrical objects.
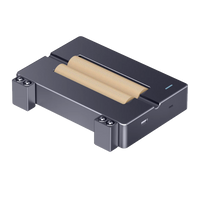
- Secure the Candle in the Engraving Area:
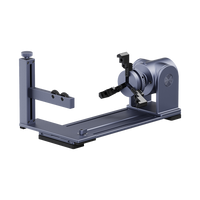
Use a rotary attachment if your laser engraver supports it. This attachment allows the candle to rotate during engraving, ensuring an even and consistent design around the circumference.
- Preview and Adjust Settings:
Before starting the engraving process, use the laser engraving machine's preview function to ensure the design is correctly positioned and scaled. Make any necessary adjustments.
- Start the Engraving Process:
Once satisfied with the settings, initiate the engraving process. The laser will follow the designated path, creating the engraved design on the candle.
- Monitor the Process:
Keep an eye on the engraving process to ensure it is proceeding as expected. Make adjustments if necessary.
- Remove and Inspect the Engraved Candle:
Once the engraving is complete, carefully remove the candle from the machine. Inspect the engraved design to ensure it meets your expectations.
- Clean the Engraved Candle:
Gently clean the engraved candle to remove any residue or debris produced during the engraving process.
- Optional Finishing Touches:
If desired, you can apply a clear sealant or wax to protect and enhance the engraved design.
Part 3: What Can Engraved Candle Use For?
Engraved candles can be used for various purposes, adding a personal and decorative touch to different occasions. Here are some common uses for engraved candles:
- Gifts:
Engraved candles make thoughtful and personalized gifts for birthdays, anniversaries, weddings, or other special occasions. You can engrave names, dates, or meaningful messages on the candles to make them extra special.
- Decor:
Engraved candles can serve as decorative elements in your home. Use them as centerpieces for dining tables, mantelpiece decor, or to create a warm and inviting atmosphere in any room.
- Weddings:
Engraved candles are popular for weddings as they can be customized with the couple's names, wedding date, or special quotes. They can be used as centerpieces, wedding favors, or part of the overall decor.
- Memorials:
Engraved candles can be a touching way to remember and honor loved ones who have passed away. Personalized messages or names can be engraved on memorial candles for remembrance ceremonies.
- Celebrations:
Use engraved candles to celebrate achievements, graduations, promotions, or any other milestone. Engraving the details of the accomplishment on the candle adds a unique touch.
- Religious Ceremonies:
Engraved candles can be used in religious ceremonies, such as baptisms, confirmations, or dedications. Customize the candles with religious symbols, names, or dates to make them fitting for the occasion.
- Holidays:
Engraved candles can be part of holiday decor, adding a personal touch to celebrations like Christmas, Hanukkah, or Diwali. You can engrave holiday greetings, symbols, or names on the candles.
- Corporate Events:
Engraved candles can be used as corporate gifts or as part of company events. Customize them with company logos, event names, or messages for a professional touch.
- Aromatherapy:
Engraved candles with calming or inspirational messages can be used in aromatherapy practices. The combination of fragrance and personalized messages can enhance relaxation and positive vibes.
- Home Fragrance:
Engraved candles can serve a functional purpose by providing both light and fragrance to a space. Engrave the candles with scents and messages that align with the ambiance you want to create.
Conclusion
In the soft glow of an engraved candle, we find a fusion of artistry and sentimentality that transcends the ordinary. Whether adorning a celebratory table, expressing condolences, or illuminating the path of a new journey, engraved candles encapsulate the essence of meaningful connections and shared experiences.
These waxen canvases, etched with care and consideration, stand as testament to the enduring power of customization and personal touch in our lives. As we navigate the tapestry of occasions and emotions, the engraved candle remains a symbol of warmth, remembrance, and the enduring beauty found in the intersection of light and sentiment.