


Engraved bricks offer a timeless way to memorialize events, honor loved ones, or commemorate special occasions. The art of engraving bricks has evolved over time, becoming a popular choice for fundraising campaigns, commemorative pathways, or personalized structures.
This blog aims to explore the intricacies of engraving bricks, from the techniques involved to the creative possibilities it presents.

In this article:
Part 1: All About Engraved Bricks
1. Brick Types and Materials:
Clay Bricks: Commonly used due to their durability and suitability for engraving.
Concrete Bricks: Offer a smoother surface for engraving, allowing for finer details.
2. Applications of Engraved Bricks:
Memorials and Monuments: Engraved bricks often grace the pathways of memorials, honoring individuals, groups, or historical events.
Fundraising Initiatives: Non-profits or organizations often use engraved bricks as part of fundraising campaigns, offering personalized bricks for sale to supporters.
Personalized Gifts and Celebrations: Individuals opt for engraved bricks to mark milestones like weddings, anniversaries, or as unique gifts.
3. Design and Personalization:
Text and Messages: Engraved bricks typically feature names, dates, quotes, or brief messages. Font styles and sizes can vary based on preference.
Custom Artwork or Logos: Advanced techniques allow for intricate designs, logos, or even photographs to be engraved onto bricks.
4. Installation and Maintenance:
Installation: Engraved bricks are usually laid within pathways or structures during construction or renovation projects.
Maintenance: Proper sealing or protective coatings might be applied to preserve the engraved surface against weathering over time.
5. Considerations for Engraved Bricks:
Location: Choosing the right placement is crucial for visibility and longevity.
Durability: Properly engraved bricks can withstand weather elements and foot traffic for years.
Part 2: How to Laser Engrave Bricks?
Laser engraving bricks involves precision and specialized equipment to etch designs onto the brick surface. Here's a detailed guide on the tools needed and the step-by-step process:
Tools Needed:
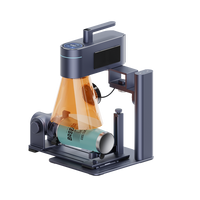
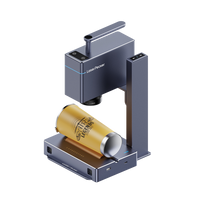
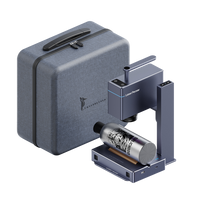
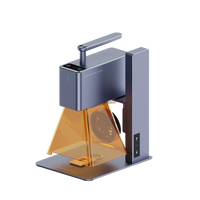
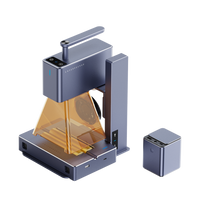
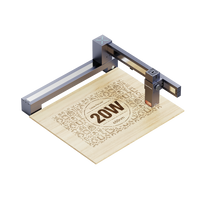
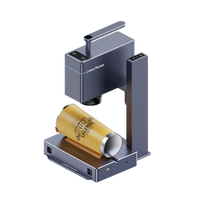
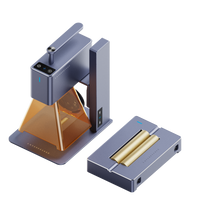
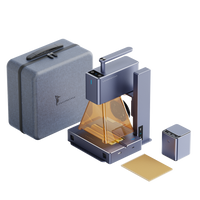
- Laser Engraving Machine: Choose a laser engraving machine suitable for brick engraving.
- Computer with Design Software: Use design software compatible with the laser engraving machine to create or import the desired artwork, text, or designs.
- Bricks: Select bricks made of materials suitable for laser engraving, such as clay or concrete bricks. Ensure the bricks are clean and free from debris or coatings.
- Safety Equipment: Safety goggles, gloves, and protective gear to ensure safe operation around the laser.
Steps to Laser Engrave Bricks:
Step 1 - Prepare the Design:
Using design software, create or import the artwork, text, or design to be engraved on the brick. Ensure the design dimensions match the brick's surface area.
Step 2 - Set Up the Laser Engraving Machine:
Calibrate the laser engraving machine according to the manufacturer's instructions.
Adjust settings such as laser power, speed, and resolution based on the type of brick and desired engraving depth.
Step 3 - Secure the Brick:
Place the brick securely within the engraving area of the machine, ensuring it is level and firmly positioned to prevent movement during engraving.
Step 4 - Test Run and Alignment:
Perform a test run on a similar material or a spare brick to check the engraving settings and alignment of the design.
Step 5 - Load the Design and Start Engraving:
Upload the finalized design into the laser engraving software and ensure proper alignment with the brick's surface.
Start the engraving process according to the software's instructions, initiating the laser to etch the design onto the brick.
Step 6 - Monitor the Engraving Process:
Keep a close eye on the engraving progress to ensure the design is being accurately etched onto the brick surface. Adjust settings if necessary.
Step 7 - Remove Engraved Brick and Clean:
Once the engraving process is complete, carefully remove the engraved brick from the machine.
Use a soft brush or cloth to clean off any debris or residue from the engraving process.
Step 8 - Inspect and Finish (Optional):
Inspect the engraved design to ensure it meets quality standards.
Apply a sealant or protective coating if desired to enhance durability and preserve the engraved surface.
Step 9 - Final Check and Packaging:
Check the engraved brick for any imperfections or inconsistencies.
Package the engraved brick carefully to prevent damage during handling or transportation.
Part 3: Mechanical Engraving Bricks
Tools Needed:
- Engraving tools (such as chisels, hammers, or pneumatic tools)
- Stencils or templates for design guidance
- Safety equipment (goggles, gloves, etc.)
Steps for Mechanical Engraving:
- Design Preparation: Create or acquire a stencil/template of the desired design or text to guide the engraving process.
- Brick Preparation: Place the brick in a secure location and ensure it's stabilized to prevent movement during engraving.
- Engraving Process: Using the appropriate engraving tool (chisel, hammer, or pneumatic tool), carefully carve or chisel the design onto the brick's surface, following the stencil or template.
- Precision and Detailing: Exercise caution and precision to ensure the desired depth and clarity of the engraving. Different tools and techniques may allow for varying levels of intricacy in the design.
Part 4: Sandblasting Bricks
Tools Needed:
- Sandblasting equipment (sandblaster, air compressor, abrasive material)
- Stencils or masks for design protection
Steps for Sandblasting:
- Design Masking: Cover the areas of the brick that won't be engraved with a protective stencil or mask. This will ensure only the exposed areas are affected by the sandblasting.
- Brick Placement: Position the brick securely within the sandblasting enclosure or workspace.
- Sandblasting Process: Use the sandblaster to project abrasive materials (such as sand or grit) onto the surface of the brick. This will erode the exposed areas, creating the engraved design.
- Control and Precision: Adjust the pressure and distance of the sandblaster to control the depth and precision of the engraving.
Part 5: Chemical Etching Bricks
Tools Needed:
- Chemical etching solutions (such as acid)
- Protective gear (gloves, goggles, etc.)
- Stencils or masks for design protection
Steps for Chemical Etching:
- Design Masking: Protect the areas of the brick that won't be etched by applying a stencil or protective coating.
- Application of Etching Solution: Apply the chemical etching solution to the exposed surface of the brick. The solution will interact with the brick material, creating the engraved design.
- Safety and Caution: Handle chemical etching solutions carefully, following safety guidelines and instructions to prevent accidents or skin contact.
Part 6: Hot 10 FAQs About Engraving Bricks
- What are Engraved Bricks typically used for?
Engraved bricks are commonly used for memorializing loved ones, fundraising initiatives, creating pathways in gardens or public spaces, commemorating special events, or as personalized gifts.
- Which materials are suitable for engraving bricks?
Bricks made from materials like clay or concrete are often preferred for engraving due to their durability and compatibility with various engraving methods.
- What designs or messages can be engraved on bricks?
Designs may include names, dates, quotes, logos, symbols, or even photographs. The possibilities are vast, allowing for personalized and unique engravings.
- What is the lifespan of engraved bricks?
Engraved bricks, when properly installed and maintained, can endure for decades, often remaining legible and intact for 50 years or more, depending on the environmental conditions.
- Are there limitations in the size or font of the engraving?
While there might be practical limitations based on the size and surface area of the brick, modern engraving techniques often allow for a wide range of font styles and sizes.
- How weather-resistant are engraved bricks?
Engraved bricks are generally weather-resistant, especially when sealed or coated appropriately. Proper sealing can protect the engravings from elements like rain, snow, and UV rays.
- Can previously laid bricks be engraved?
Yes, previously laid bricks can often be engraved, although it might require specialized equipment or techniques. However, it's typically easier to engrave bricks before they are laid in a structure or pathway.
- What's the difference between laser and mechanical engraving of bricks?
Laser engraving uses high-precision lasers to etch designs, providing intricate detailing. Mechanical engraving involves physically cutting or carving the brick's surface using tools, providing a more handcrafted appearance.
- Can engraved bricks be customized for specific fundraising campaigns?
Absolutely, engraved bricks are commonly used in fundraising campaigns. Organizations often sell personalized bricks as a way to raise funds for specific causes, allowing donors to leave a lasting mark.
- How can one maintain engraved bricks over time?
Regular cleaning and applying protective coatings or sealants can help maintain engraved bricks. Periodic inspections for damage or wear are also recommended to ensure their longevity.
Conclusion
In conclusion, the art of engraving bricks serves as a timeless method to immortalize memories, honor individuals, and contribute to various meaningful endeavors. Whether for commemorating loved ones, fundraising initiatives, or personalizing spaces, engraved bricks offer a durable and lasting testament to significant events.
Engraved bricks hold immense value in public spaces, memorial pathways, fundraising campaigns, and as personalized gifts, allowing individuals and organizations to leave a lasting mark and contribute to a legacy that endures through time. Their versatility, durability, and creative potential make them a cherished choice for honoring memories and celebrating special occasions.


