


Learning stone laser engraving allows you to craft timeless artistic pieces using materials readily available almost anywhere. With the right tools, a bit of skill, and practice, you can create beautiful designs on stones for your home, garden, or as heartfelt gifts.
In this blog, we will introduce how to engrave stones and rocks with different engraving techniques. Additionally, we will also show how to engrave 5 types of stones and rocks, including slate, granite, marble, sandstone, and limestone.

In this article:
Part 1: How to Laser Engrave Stone
Laser engraving on stone involves using a concentrated beam of light to etch or engrave designs, text, or patterns onto the surface of various types of stones. This method offers precision, durability, and the ability to create intricate and detailed designs that enhance the natural beauty of the stone. The process requires specialized equipment and knowledge to achieve optimal results.
Tools Needed for Laser Engraving on Stone
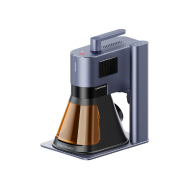
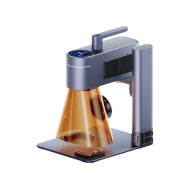
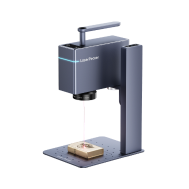
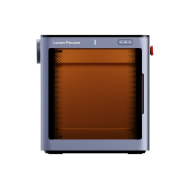
Stone Laser Engraving Machine: Choose a laser engraving machine suitable for stone engraving.
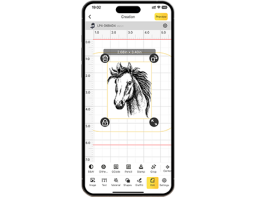
Laser Engraving Software: Use the Design software compatible with the laser engraving machine for creating or importing designs.
Stone Material: Various types of stones like granite, marble, slate, or river rocks, suitable for engraving.
Protective Gear: Equip with safety goggles and gloves to shield against laser exposure and debris.
Cleaning Materials: Isopropyl alcohol, water, and a soft cloth for cleaning the stone surface.
How to Laser Engrave Stone
Step 1 - Preparing the Design:
Create or import your design into the laser engraving software. Adjust the dimensions, position, and settings as per the stone and desired engraving outcome.
Step 2 - Preparing the Stone:
Clean the stone surface thoroughly to remove dust, dirt, or debris. Place the stone securely within the engraving machine's working area and adjust the focus.
Step 3 - Setting Up the Laser Engraving Machine:
Configure the laser settings such as power, speed, and resolution based on the stone type and desired engraving depth. Double-check the alignment and settings to ensure accuracy.
Step 4 - Testing and Calibration:
Perform a test engraving on a small area of the stone to verify the settings and adjust if necessary. Calibrate the machine for optimal engraving results.

Step 5 - Commencing the Engraving Process:
Start the engraving process through the software interface, allowing the laser to follow the designed pattern or text on the stone surface. Monitor the process for any unexpected issues and make adjustments if needed.
Step 6 - Post-Engraving Care:
Once the engraving is complete, carefully remove the stone from the machine. Clean the engraved area with isopropyl alcohol or water and a soft cloth to remove any residue or marks.
Step 7 - Inspection and Finishing:
Inspect the engraved design for quality and completeness. Apply sealant or polish if desired to enhance the appearance and durability of the engraving.
Part 2: How to Engrave Stone with A Dremel
Engraving stone using a Dremel tool offers a versatile and accessible method to create intricate designs or patterns on various types of stones. This technique provides a hands-on approach, allowing for artistic expression and customization while requiring basic tools and a steady hand for precise engraving.
Tools Needed for Stone Engraving with a Dremel
Dremel Rotary Tool: Select a Dremel tool with variable speed settings and a variety of compatible attachments suitable for stone engraving.
Engraving Bits: Carbide or diamond-tipped engraving bits of different shapes and sizes for cutting and detailing.
Safety Gear: Safety goggles to protect eyes from debris and a dust mask for respiratory safety.
Stone Material: Choose stones like granite, marble, quartz, or river rocks for engraving.
Stabilization: Clamps or a secure workstation to hold the stone in place during engraving.
Cleaning Materials: Water, soft cloth, and a brush to clean the stone surface.

How to Engrave Stone with a Dremel
Step 1 - Design Preparation:
Sketch or transfer your design onto the stone surface using a pencil or marker as a guideline.
Step 2 - Selecting the Engraving Bit:
Choose an appropriate engraving bit based on the size and intricacy of the design, ensuring it's compatible with the Dremel tool.
Step 3 - Stone Preparation:
Clean the stone thoroughly to remove dirt, dust, or debris from the surface. Securely fasten the stone onto a stable surface or clamp it to prevent movement during engraving.
Step 4 - Setting Up the Dremel:
Insert the selected engraving bit into the Dremel tool and adjust the speed settings as needed for precise control.
Step 5 - Commencing the Engraving Process:
Begin engraving by lightly tracing the design outlines on the stone using the Dremel tool. Maintain a steady hand and apply consistent pressure. Gradually deepen the engraved lines or areas, adjusting the pressure and angle of the Dremel tool for desired depth and detail.
Step 6 - Detailing and Finishing:
Work on intricate details by changing the engraving bit if necessary to achieve finer lines or shading. Clean the stone periodically during the process to remove debris and better visualize the engraved design.
Step 7 - Post-Engraving Care:
Once the engraving is complete, wipe the stone surface with a damp cloth to remove any leftover dust or residue. Inspect the engraved design for clarity and depth.
Step 8 - Optional Finishing Touches:
Apply sealant or polish to enhance the appearance and longevity of the engraved stone if desired.
Part 3: How to Engrave Stone by Hand (Carving)
Hand engraving on stone is a traditional yet rewarding technique that allows artisans to create intricate designs, patterns, or texts on various types of stones using manual tools. This method offers a hands-on approach, providing a unique level of craftsmanship and precision while requiring skill and patience for optimal results.

Tools Needed for Hand Engraving on Stone
Chisels: Various sizes and shapes of chisels with carbide or steel tips for cutting and carving on stone.
Hammers or Mallets: Used to strike the chisels gently for controlled and precise engraving.
Safety Gear: Safety goggles, gloves, and a dust mask to protect against debris and ensure personal safety.
Stone Material: Choose stones like granite, marble, slate, or limestone suitable for hand engraving.
Cleaning Materials: Water, soft cloth, and a brush to clean the stone surface during and after engraving.
How to Engrave Stone by Hand
Step 1 - Design Preparation:
Sketch or transfer the desired design onto the stone surface using a pencil or marker as a guide for engraving.
Step 2 - Selecting the Chisel:
Choose appropriate chisels based on the design complexity. Larger chisels for broader strokes and smaller ones for fine detailing.
Step 3 - Stone Preparation:
Ensure the stone surface is clean and free of debris. Securely position the stone on a stable surface or workbench.
Step 4 - Starting the Engraving Process:
Begin engraving by holding the chisel at a slight angle to the stone's surface. Use controlled strikes with the hammer or mallet to create indentations following the design outlines. Gradually deepen the engraved lines by repeating the process, adjusting pressure and angle for depth and detail.
Step 5 - Detailing and Refinement:
Work on intricate details by using smaller chisels or adjusting the angle and force of the strikes. Take breaks to assess progress and ensure the design is evolving as intended.
Step 6 - Cleaning and Inspection:
Periodically clean the stone surface with water and a soft cloth to remove debris and better visualize the engraved design. Inspect the engraved lines for consistency and clarity, making necessary adjustments as you proceed.
Step 7 - Post-Engraving Care:
Once the engraving is complete, clean the stone surface thoroughly to remove any remaining dust or debris. Optionally, use a sealant or polish designed for stones to enhance the appearance and protect the engraved surface.
Part 4: How to Engrave Different Stones And Rocks
1. How to Engrave Slate
- Tool Selection: Use fine-tipped engraving bits or diamond-tipped tools suited for slate engraving. Diamond burrs work well for intricate designs.
- Technique: Keep a steady hand and apply consistent pressure while engraving slate. Opt for shallow, delicate cuts as slate can be prone to chipping.
- Test Engraving: Prior to the main design, practice engraving on a small slate piece to understand the depth and texture control needed.
2. How to Engrave Granite
- Durable Engraving Bits: Employ harder materials like tungsten carbide or diamond-tipped engraving bits for granite, as it's a tough stone.
- Speed and Pressure: Use a moderate speed setting on the engraving tool and apply firm but not excessive pressure to achieve clean, precise lines.
- Cooling Breaks: Take intermittent breaks during granite engraving to prevent overheating of the tool and stone, ensuring better results.
3. How to Engrave Marble
- Gentle Touch: Marble is softer compared to granite, so use lighter pressure when engraving to avoid creating deep or unintended marks.
- Fine Detailing: Opt for smaller engraving bits for intricate details on marble. Test the depth and pressure before starting the main design.
- Surface Preparation: Ensure the marble surface is clean and free of debris to prevent scratches or inconsistencies during engraving.
4. How to Engrave Sandstone
- Low-Speed Engraving: Sandstone is delicate, requiring slower speed settings on the engraving tool to avoid damaging the stone's surface.
- Patience with Pressure: Apply gentle and consistent pressure while engraving sandstone. Avoid excessive force to prevent chipping or cracking.
- Deep Etching Caution: Be cautious with deep etching on sandstone, as it can weaken the stone structure. Opt for shallow engraving for best results.
5. How to Engrave Limestone
- Careful Tool Selection: Choose engraving bits suited for softer stones to avoid causing damage. Diamond-tipped or carbide bits with smaller tips work well.
- Surface Testing: Test a small area of the limestone surface to understand how the stone reacts to engraving depth and pressure.
- Light Pressure Engraving: Use light and consistent pressure to prevent the stone from chipping or flaking while engraving limestone.
FAQs About Stone Engraving
1. Can any type of stone be engraved?
While many stones can be engraved, some are easier to work with than others. Granite, marble, slate, sandstone, and limestone are commonly used for engraving due to their varying hardness and texture.
2. How to engrave stone at home?
Using tools like chisels, Dremel tools, or a laser engraving machine, you can create designs on stones. Ensure you have safety gear and practice on small stones first. Working in a well-ventilated area is important due to dust.
3. Where can I find resources or tutorials to learn stone engraving?
You can find online tutorials, instructional videos, and community forums dedicated to stone engraving. Additionally, local craft stores or workshops might offer classes or guidance on getting started with stone engraving.
Conclusion
In conclusion, stone engraving is a gateway to endless creative possibilities. Whether using a laser, a Dremel tool, or other methods, mastering this art demands patience, practice, and attention to detail.
Each stone type-from slate to granite, marble, sandstone, and limestone-requires specific techniques for the best results. By following tailored tips and guidelines, enthusiasts can achieve stunning designs that highlight the stone's natural beauty.
Explore the artistry, experiment with different stones, and unleash creativity. With the right knowledge and tools, stone engraving transforms ordinary rocks into timeless works of art that endure for generations.