


Engraving a mirror is a fascinating art that adds a unique and personal touch to home decor. Mirrors, often considered simple functional items, can transform into exquisite pieces of art through the process of engraving.
As the popularity of DIY projects continues to rise, discovering how to engrave a mirror opens up new creative possibilities for individuals seeking to enhance their living spaces.

In this article:
Part 1: All About Engraved Mirrors
Types of Mirrors for Engraving
When considering types of mirrors for engraving, it's essential to choose surfaces that are suitable for the engraving process. Here are a few types of mirrors that work well for engraving:
- Framed Mirrors:Framed mirrors provide a defined border, offering a clear canvas for engraving. The frame itself can be engraved or serve as a complement to the engraved design on the mirror.
- Wall Mirrors:Large wall mirrors offer a spacious surface for more intricate and elaborate engraving designs. These mirrors can become a focal point in a room, showcasing your personalized artistic touch.
- Frameless Mirrors:Frameless mirrors provide a modern and sleek look, allowing the engraving to take center stage. Engraving directly on the mirror's surface without a frame can create a seamless and integrated design.
- Vintage or Antique Mirrors:Older mirrors with unique shapes or ornate frames can add character to the engraving. Engraving these mirrors can enhance their vintage charm and make them stand out as statement pieces.
- Decorative or Specialty Mirrors:Mirrors with specific shapes or decorative elements can be chosen for engraving. Consider mirrors with interesting cutouts or patterns that can be incorporated into the engraving design.
- Compact Mirrors:Small, handheld mirrors or compact vanity mirrors are ideal for smaller, detailed engravings. These mirrors can be personalized and make for excellent gifts due to their portable nature.
Part 2: How to Laser Engrave A Mirror?
Laser engraving a mirror can result in intricate and precise designs. Here's a step-by-step guide on how to laser engrave a mirror:
Materials and Tools:
- Mirrored glass
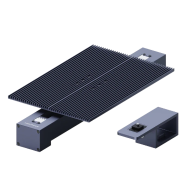
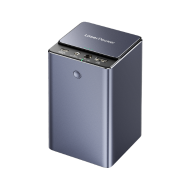
- Laser engraving machine
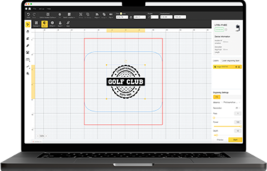
- Design software
- Protective gear (safety glasses and gloves)
- Masking tape or adhesive stencil (if needed)
Detailed Steps:
1. Prepare the Design:
Create or choose a digital design suitable for laser engraving. Ensure that the design is compatible with your laser engraving machine's software.


2. Secure the Mirror:
Place the mirrored glass in the laser engraving machine. Secure it in place to prevent movement during the engraving process.
3. Focus the Laser:
Adjust the laser engraving machine's focus to ensure precise engraving. This step is crucial for achieving a sharp and clear design on the mirror surface.
4. Set Engraving Parameters:
Configure the engraving parameters such as speed, power, and resolution based on the material (mirrored glass) and the desired outcome. Refer to the laser engraving machine's manual for guidance.
5. Protect Surrounding Areas:
Cover the surrounding areas of the mirror with masking tape or use an adhesive stencil to protect any parts of the mirror you don't want to be engraved.
6. Wear Protective Gear:
Put on safety glasses and gloves to protect yourself from potential laser exposure and to handle the mirrored glass safely.
7. Load the Design:
Load the chosen design into the laser engraving machine's software. Make any necessary adjustments to the positioning and size of the design to fit the mirror.

8. Run the Engraving Process:
Start the laser engraving process. The machine will follow the designated path, engraving the design onto the mirror. Monitor the process to ensure the desired depth and quality of engraving.

9. Clean the Engraved Mirror:
Once the engraving is complete, carefully remove the mirror from the machine. Clean any residue left on the mirror's surface using a gentle glass cleaner or isopropyl alcohol.

10. Inspect the Engraving:
Inspect the engraved mirror to ensure the design meets your expectations. If necessary, make any final touches or adjustments. For more info, please check our LaserPecker CraftZone!

11. Optional: Apply Protective Coating:
Consider applying a clear protective coating over the engraved area to enhance durability and protect the design over time.
Part 3: How to Engrave A Mirror with A Dremel?
Engraving a mirror with a Dremel tool is a hands-on and artistic process. Here's a step-by-step guide on how to engrave a mirror using a Dremel:
Materials and Tools:
- Dremel rotary tool
- Diamond-tipped engraving bit
- Mirrored glass
- Masking tape
- Protective gear (safety glasses and gloves)
- Pencil or marker (for outlining the design)
- Soft cloth
Detailed Steps:
1. Choose or Create a Design:
Decide on the design you want to engrave on the mirror. Simple and intricate designs can both be effective, depending on your preferences.
2. Secure the Mirror:
Place the mirrored glass on a stable and flat surface. Ensure that it is well-supported to prevent any movement during the engraving process.
3. Clean the Mirror:
Wipe the mirror surface with a soft cloth to remove any dust or smudges. A clean surface ensures better visibility and a smoother engraving process.
4. Outline the Design:
Use a pencil or marker to lightly outline the chosen design on the mirror. This outline will serve as a guide during the engraving process.
5. Apply Masking Tape:
Cover the areas around the outlined design with masking tape. This helps protect the surrounding areas of the mirror and prevents accidental scratches.
6. Attach Diamond-tipped Engraving Bit:
Select a diamond-tipped engraving bit suitable for glass and attach it to the Dremel rotary tool. Ensure that it is securely fastened.
7. Adjust Dremel Speed:
Adjust the speed of the Dremel to a medium or low setting. Higher speeds may generate excess heat, potentially damaging the mirror or causing the engraving bit to wear out quickly.
8. Start Engraving:
Begin engraving along the outlined design on the mirror. Hold the Dremel tool at a comfortable angle and apply gentle pressure. Let the tool do the work, and avoid forcing it to prevent damage.
9. Clean Periodically:
Periodically stop and clean away any debris or residue from the engraving. This ensures better visibility and a cleaner engraving process.
10. Fine-Tune Details:
As you progress, fine-tune details and make any necessary adjustments to the depth and width of the engraving. Take your time to achieve the desired result.
11. Clean the Engraved Mirror:
Once the engraving is complete, carefully remove any masking tape and clean the mirror surface. Wipe away any remaining debris or residue with a soft cloth.
12. Inspect the Engraving:
Inspect the engraved mirror to ensure that the design meets your expectations. Make any final touches or adjustments if needed.
Part 4: Hot 10 FAQs About Engraving Mirror
Q1: Can I engrave any type of mirror?
A: Yes, you can engrave various types of mirrors, including framed mirrors, wall mirrors, vintage mirrors, and frameless mirrors. Choose a mirror that suits your design preferences and project requirements.
Q2: What tools do I need for mirror engraving?
A: The tools needed for mirror engraving depend on the method chosen. For laser engraving, you'll need a laser engraving machine. For Dremel engraving, a Dremel rotary tool with a suitable engraving bit is required. Traditional etching methods may involve glass etching cream, stencils, and protective gear.
Q3: Is it possible to engrave a mirror at home?
A: Yes, it's possible to engrave a mirror at home using various methods. DIY options include laser engraving machines, Dremel tools, or traditional glass etching techniques.
Q4: Can I engrave a mirror with a design of my choice?
A: Absolutely! Engraving mirrors allows for a high degree of customization. You can choose or create a design that suits your personal style and complements your home decor.
Q5: Is mirror engraving permanent?
A: Yes, mirror engraving is generally permanent, especially when using methods like laser engraving or glass etching. The engraved design becomes a permanent part of the mirror's surface.
Q6: How do I protect the surrounding areas during mirror engraving?
A: Use masking tape or adhesive stencils to cover the surrounding areas of the mirror and protect them from accidental spills or scratches during the engraving process.
Q7: Can I engrave a mirror with a Dremel tool?
A: Yes, you can engrave a mirror with a Dremel tool. Use a diamond-tipped engraving bit and follow a careful, precise process to achieve your desired design.
Q8: What safety precautions should I take during mirror engraving?
A: Wear protective gear, including safety glasses and gloves, to protect yourself from potential hazards such as dust or chemicals (in the case of glass etching).
Q9: Can I engrave a mirror without special equipment?
A: Yes, traditional glass etching methods allow you to engrave a mirror without special equipment. Glass etching cream and stencils are commonly used for this purpose.
Q10: Can I engrave a mirror for decorative purposes?
A: Absolutely! Engraving mirrors for decorative purposes is a popular choice. You can add personalized and artistic touches to mirrors, turning them into unique pieces of home decor.
Conclusion
In conclusion, engraving a mirror offers a creative and customizable way to enhance your home decor. Whether using advanced tools like laser engraving machines or opting for a hands-on approach with a Dremel tool, the process allows for personalized designs that become a permanent part of the mirror's surface.
From choosing the right type of mirror to taking safety precautions and exploring various engraving methods, the possibilities for creating unique and decorative pieces are diverse. With the right tools and techniques, mirror engraving can be a rewarding DIY project that adds a touch of individuality to your living space.