


Mother's Day is always a special occasion for us to celebrate and honor the most important women in our lives for their love, care and sacrifice. Everyone knows actions speak louder than words, so to show mom how much you love her with perfect gifts has been an impeccable choice for most of us. However, sometimes with various dazzling gifts in the shopping mall, it is difficult for us to make the right choice.
Sure, you could pick up some flowers, chocolates, or a greeting card, but a personalized gift made by yourself can add a unique and special meaning to this day which best conveys your love and appreciation for her. Personalized gifts allow you to add your own touch to the gift, making it even more special with your own messages or pictures. Not only will it be a unique and heartfelt present, but it will also show her how much thought and effort you put into making her day special. Plus, it's a fun and creative way to spend time with your mom.
A personalized gift using a laser engraver is a thoughtful, creative and lasting way of expressing your love, which allows you to add custom, precise and detailed designs, such as her name, special messages, favorite quote, and even photos. You can also choose a material and a shape that suits her style and personality, such as wood, metal, glass, acrylic, etc. Laser engraver can produce high-quality and durable results that will not fade over time. You can create gifts that will last for years and remind your mom of your love every time she sees them.
In this blog, we will show you some of our best gift's inspirations for Mother's Day you can make with laser engravers and teach you how to make it. Let's get started!
In this article:
1. Necklace pendants
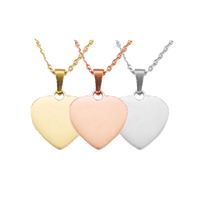
One great laser engraving idea for a Mother's Day gift is a personalized stainless steel necklace pendant with a special message or image. A stainless-steel necklace pendant engraved with a special message or image is not only a beautiful piece of jewelry, but also a thoughtful gift that your mom can cherish for years to come.
For example, you could engrave the pendant with a photo of your mom or a cheerful moment you spent with her, showcasing your love and appreciation for her. By taking the time to create a personalized gift like this, you are showing your mother how much she means to you and the importance of the memories you share. This simple yet thoughtful gift can have a significant impact on your relationship and make this Mother's Day even more special.
How to make it using a laser engraver?
To create a personalized stainless steel necklace pendant, follow these simple steps:
1. Choose the pendant shape and size: Stainless steel necklace pendants come in a variety of shapes and sizes. Choose the one that best fits your design and style preferences. You can choose pendants in LaserPecker's Premium Material Package which would offer you a variety of choices for necklaces.
2. Prepare your image or message: Select a photo or message that you would like to engrave onto the pendant. Make sure the image or message is clear and high-resolution.
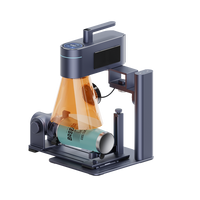
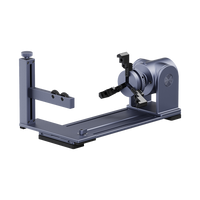
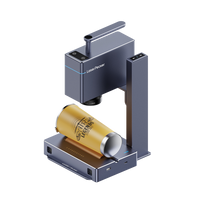
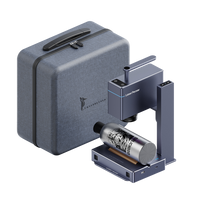
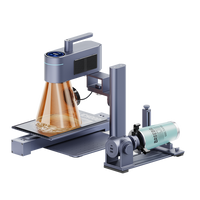
3. Set-up your laser engraver: For the best results, consider using a high-quality laser engraving machine like LaserPecker LP3. Assemble the machine within 5 minutes, download the LaserPecker App and sign up, connect it to the LP3 via Bluetooth. Place the pendant in the working area, and adjust the focal distance by turning on the Red Dot Stay button on the App, and lifting or descending the electric stand until the two infrared dots conjunct.
4. Upload your design and adjustment: Once your equipment is ready, it's time to upload your design onto the LaserPecker APP. Whether you want to engrave an image or text, the APP's Creation Page allows you to design and customize your patterns to create a personalized pendant for your mom. You can set up the preview mode to check the working area and ensure your pattern is on the right position of the pendant. You can also preview the final result and make any necessary adjustments.
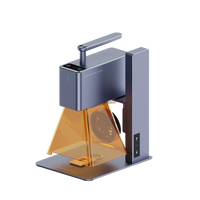
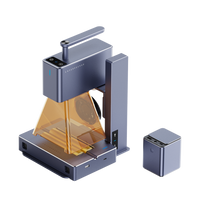
5. Start engraving and wait: You can choose the built-in setting recommendations or set your own customized setting, such as the power, depth and the pass. Now you can start engraving! The engraving process is fully automatic without any further manual work. The LaserPecker LP3 provides a 1064nm infrared laser that is perfect for engraving on stainless steel. Its highly advanced galvanometer technology ensures an engraving speed of up to 800mm/s and ultra-accuracy with a 4K resolution for a lifelike image.
6. Receive your engraved pendant: Once your working process is complete, your stainless-steel necklace pendant with your own personalized patterns is ready. To complement your necklace, consider adding additional beads or experimenting with different materials and colors to create a unique look. And finally, gift-wrap the pendant and present it to your mom on Mother's Day!
(IG: @welaserart)
These pendants come from a LaserPecker user, the parameters of settings are 100% power, 60% depth and 1 pass.
2. Wooden Bouquet Model
Creating a wooden flower bouquet model using a laser engraver is another heartfelt DIY gift for Mother's Day. Unlike real flowers that will eventually wither and fade, a wooden flower bouquet lasts for a very long time and serves as a cherished keepsake for years, reminding mom of your love and appreciation every time she sees it. And more importantly, creating a wooden flower bouquet model by yourself infuses your unique spirit and emotions into the gift, making it even more special and valuable to your mom as a token of your love and care.
Building a wooden bouquet requires a few more steps compared to engraving. You first need to engrave and cut the 2D shapes from plywood or natural wood using a laser engraver. Then, you need to assemble the different plates to create the 3D model. But don't worry, it's not as complicated as it seems.
How to make it using a laser engraver?
To make a wooden flower bouquet model, here are the main steps:
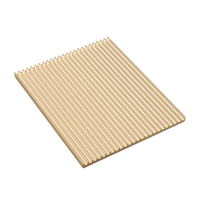
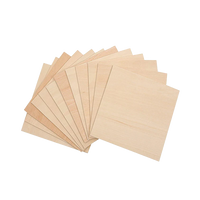
1. Select wood materials: We chose the 1/14-inch (2mm) plywood boards for the flowers and the wooden base, since plywood works great for laser cutting. You can also select some other natural wood but be careful of the thickness, resin and grain. A wood with high resin content and thickness may require higher cutting power, whereas a fine-grained wood will produce a smoother cutting face than a coarse-grained wood with lots of burrs. Hence, it's best to select a wood material that suits your design and your laser cutting equipment.
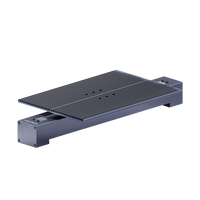
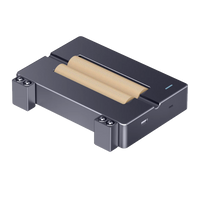
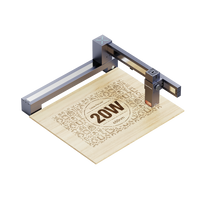
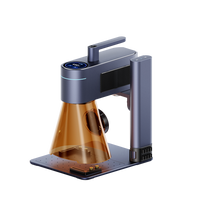
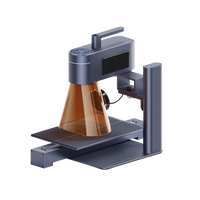
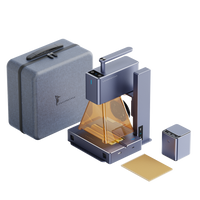
2. Choose the right laser: Wood is an organic material that readily absorbs the energy radiation of CO2 lasers (10,600 nm) and Diode lasers (450 - 950 nm), making these two types of lasers particularly well-suited for wood. Please note that other lasers such as fiber laser with a wavelength of 1064nm are not very suitable. For our wooden flower bouquet model, we used the LaserPecker LX1 with interchangeable modules of 10W & 20W 450 nm blue lasers. This laser engraver provided the ideal power and accuracy we needed to cut and engrave our wooden pieces with ease.
3. Set the machine and cutting material: First, place your wooden plate on the working area of LaserPecker LX1. Next, connect your APP to the LX1 via Bluetooth and upload your design file, and you can also design your own pictures on the Creation Page. The LX1 will automatically display a preview of the engraving or cutting area after you press the preview button on the APP.
Afterwards, you can adjust the cutting distance with the help of a small vernier. Lower the vernier until the scale on the laser head is equal to the thickness of the wood. Once the distance is set, raise the vernier and your plate is now ready for cutting!
4. Start cutting: To begin the cutting process, set the desired parameters on the LaserPecker APP or software and press the start button. Remember to wear protective goggles as the blue laser generated by the LX1 is visible and may harm your eyes. The LX1 laser engraver offers impressive power and accuracy, with an error margin of less than 0.01nm.
5. Add details and decorations: Once the cutting is complete, you can add more details and decorations to the wooden bouquet. A coat of paint can bring a pop of color to the flowers and leaves, while wood-engraving can create intricate patterns or even text on the wooden base using the laser engraver.
6. Assemble the bouquet: The accurate cutting of the LX1 ensures a smooth cutting face that allows for easy assembly of the flowers onto the wooden base even without the need for glue.
The above pictures showcases a wooden bouquet created using laser cutting with the LX1. You can personalize your bouquet by choosing different patterns to engrave onto the bouquet.
3. Acrylic Table Showpiece
Inviting your mom to have dinner at a restaurant or serving her a delicious meal cooked by yourself at home may be another wonderful idea for celebration. No matter where you are, a cozy and festive atmosphere is essential.
You can set up some table linens in your mom's favorite color or pattern to add some elegance and style to the dining area and serve her some delicious food. However, instead of just lighting some candles on the table, creating a lighting acrylic table showpiece with heartfelt words by yourself would be another meaningful gift and add a unique touch to the atmosphere as well.
How to make it using a laser engraver?
To create an acrylic table showpiece, you'll need to follow these steps:
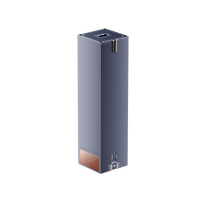
1. Select the right acrylic: Choosing a high-quality acrylic sheet is crucial for a successful engraving project. We recommend using a translucent acrylic as it will provide a 3D texture to your message, giving the impression that it is floating in the air. Keep in mind that thicker acrylic sheets may require a higher power laser to engrave properly. To make your message shine, we suggest selecting an electrical base with LED lights. This will enhance the visual impact of your table showpiece.
2. Prepare the design: First, decide on the design you want to engrave onto the acrylic sheet. You can use software like Adobe Illustrator to create your own design, or find pre-made designs online. The design can be a message or a special quote that resonates with your mom, or even a photo that captures a happy moment together. It is important to ensure that the design is of good quality and high resolution, so that the laser engraver can accurately reproduce the details.
3. Set up the acrylic and laser engraver: Before starting any engraving work, it's recommended to prepare the acrylic by painting it with a marker. This will make it opaque and increase the absorption rate of the laser. After that, connect your laser engraver to your computer and upload your design. Adjust the engraving distance and settings on your engraver, such as the power and speed.
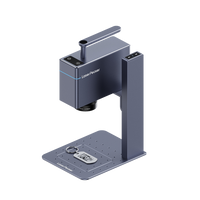
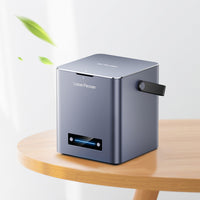
4. Engrave the acrylic: Place the opaque acrylic sheet onto the working area of the laser engraver and press the start button to begin the engraving process. The laser will engrave the design onto the surface of the acrylic. To achieve the best optical results, we recommend using LaserPecker LP2. It is the most user-friendly and the best Blue laser engraver suitable for beginners working with acrylic. With less than 5 minutes of assembly, you can enjoy a fast and ultra-fine engraving experience with a speed of 600mm/s and an accuracy of 0.05mm.
5. Adding Finishing Touches: Once the engraving is complete, clean off the black marker paint using a mixture of alcohol and water. Attach the engraved acrylic to the electrical base, and your personalized table showpiece is ready! Present this heartfelt gift to your mom, and consider combining it with a home-cooked dinner to make her day truly unforgettable.
The video above demonstrates an engraved acrylic piece with an LED effect, created using the LaserPecker LP2. For reference, the engraving settings used in this example include a 2k resolution, 100% power, 15% depth, and 1 pass.
4. Other 4 DIY Gifts
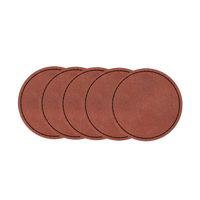
Wooden Coaster
With the similar procedure using LaserPecker engravers, you can create other fancy items for celebration of this day.
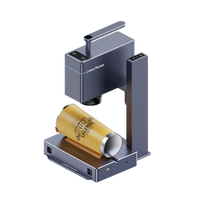
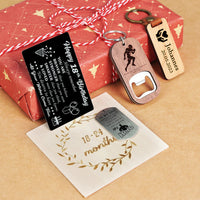
For example, the picture above showcases a wooden cup coaster made by LaserPecekr LP2. This coaster has a special design that looks like a cross-section of a tree stump, which gives it a natural and warm feel. The coaster is also quite thick, which makes it durable and able to withstand the weight of heavy stuff.
What makes this gift even more special is the engraved message on it. The message reads "Happy Mother's Day", which is a simple yet heartfelt way to express your love and appreciation for your mom. The LP2 engraver used to create this design ensures that the message is precise, clear, and long-lasting.
To make this gift even more personalized, you can add your own message or design to the coaster. For example, you could engrave your mom's name or initials, a special quote or saying that she loves, or a design that reflects her hobbies or interests. With the help of LaserPecker, the possibilities are endless.
Leather Key Chains
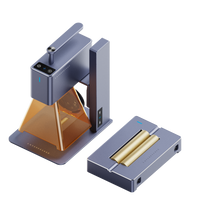
If you're looking for a practical yet stylish gift for your mom, consider a personalized leather keychain. With LaserPecker's precise engraving technology, you can create a unique design that is both elegant and functional. Choose a high-quality leather material and engrave your mom's initials, a meaningful date, or a short message that she can carry with her wherever she goes.
Metal Bracelet
For a timeless and sophisticated gift, give your mom a custom metal bracelet that she can wear. With LaserPecker's advanced engraving technology, you can create a beautiful and lasting design that will be a cherished keepsake for many years to come. Choose her preferred metal, such as silver, gold, or rose gold, and engrave it with her name, a special quote, or a significant date.
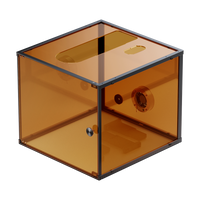
Jewlery Box
If you want to impress your mom with a gift that is both practical and sentimental, consider a personalized jewelry box. With LaserPecker's versatile engraving capabilities, you can create a custom design that will be treasured. Choose a wooden or metal jewelry box and engrave it with your mom's name or a heartfelt message. This is a gift that will not only store her favorite pieces of jewelry but also remind her of your love.
Conclusion
In conclusion, there are various thoughtful and creative ways to celebrate Mother's Day, and using a laser engraver to DIY your gift can make it even more special and personalized. Whether you choose to engrave on wood, acrylic, leather, or metal, the LaserPecker engravers provide a accurate and high-quality finish that can turn the common gifts into extraordinary ones. So, start crafting a unique and memorable gift for your mother with the help of LaserPecker. Show your appreciation and love for her on this special day, and make her day truly unforgettable.


